Homemade Brownies: A Complete Guide to Baking Bliss
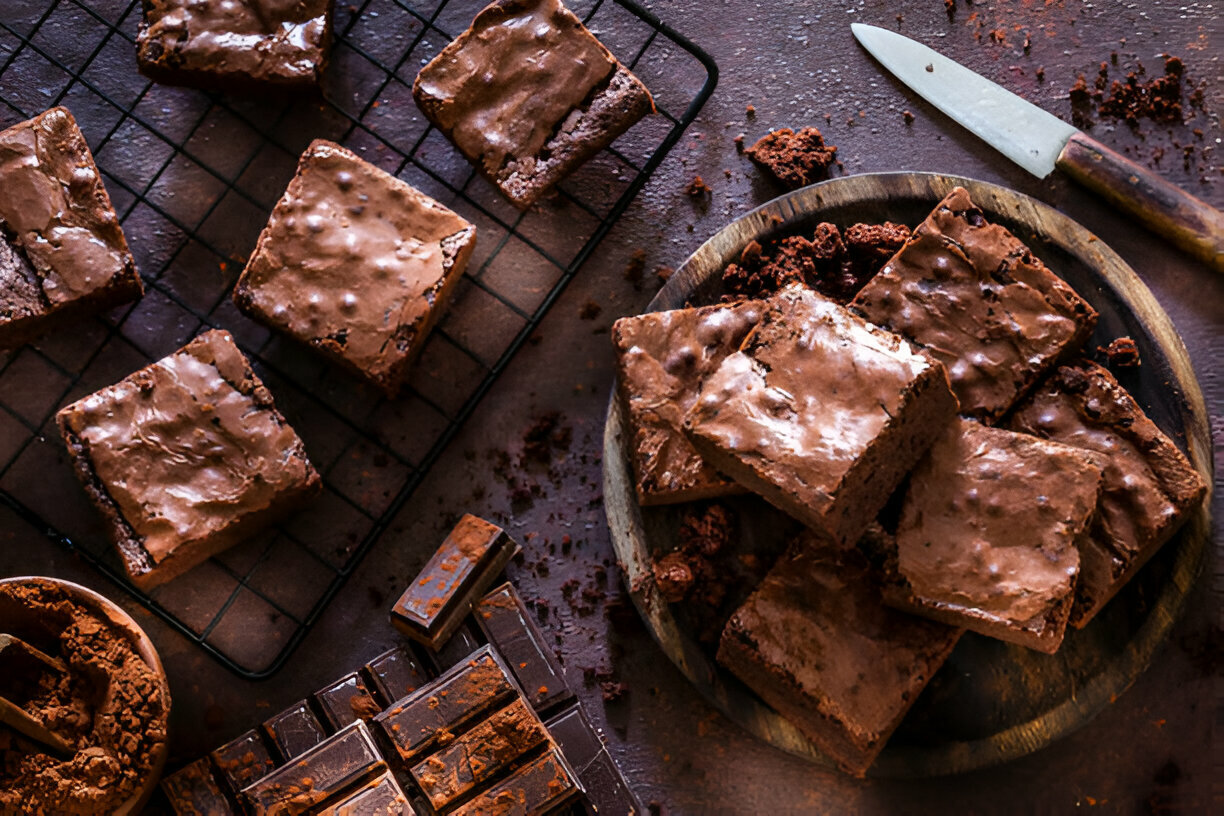
Brownies are a beloved dessert that has captured the hearts and palates of sweet enthusiasts around the world. Known for their rich chocolate flavor and delightful texture, brownies have become a staple treat in homes and bakeries alike. Whether enjoyed as a simple snack or dressed up for special occasions, their irresistible charm lies in their versatility and the joy they bring to both bakers and eaters. While store-bought brownies can be convenient, they often lack the warmth and personal touch that comes with homemade versions. Crafting brownies from scratch allows you to control the quality of the ingredients, ensuring a fresher, more flavorful result. Moreover, the process of baking brownies at home can be truly fulfilling; it’s a delightful way to engage your senses, unleash your creativity, and create something special to share with family and friends. The satisfaction that comes from preparing this delightful treat yourself is unparalleled, making homemade brownies not just a dessert but a loving expression of care and creativity.
Section 1: History of Brownies
Brownies have a rich history that dates back to the late 19th century in the United States. Although the exact origin remains somewhat unclear, they are believed to have been created in the 1890s. One popular story attributes their invention to a chef at the Palmer House Hotel in Chicago, who was tasked with creating a dessert that was both portable and suitable for women attending the 1893 World’s Columbian Exposition. The result was a small, dense chocolate cake, complete with walnuts and apricot glaze, which we now recognize as a precursor to the modern brownie.
Over the years, brownie recipes have evolved significantly. Initially, brownies were more like a dense chocolate cake, but as baking culture progressed, variations began to emerge. The recipes adapted to include different ingredients and techniques, giving rise to the beloved fudgy and chewy versions we enjoy today. These adaptations reflect changing tastes and the influence of various baking customs across America, allowing the brownie to become a versatile dessert enjoyed by all.
Section 2: Why Make Homemade Brownies?
When it comes to brownies, nothing quite compares to the taste and texture of homemade versions. The flavor of freshly baked brownies is enhanced by the quality of ingredients used, allowing you to achieve a depth of chocolate richness that store-bought options often lack. You have the opportunity to customize your brownies to your liking, whether you prefer a chewy, fudgy consistency or a lighter, cake-like texture. Experimenting with these variations can elevate your baking experience and satisfy diverse palates.
Another compelling reason to make brownies at home is the health benefits associated with controlling the ingredients. Homemade brownies can be crafted with less sugar and without preservatives, making them a healthier treat compared to many pre-packaged options. You can also incorporate healthier substitutions, such as whole grain flours or nutritious add-ins like nuts and oats, further enhancing the nutritional profile of your brownies without sacrificing flavor.
Lastly, there is an undeniable economic factor to consider. Making brownies from scratch is often much more cost-effective than purchasing commercial options. A simple list of pantry staples can yield a generous batch of brownies, proving that delicious homemade treats do not need to break the bank. Furthermore, the sense of fulfillment that comes from batch-baking brownies to share with friends and family creates an experience that transcends mere economics; it’s about creating lasting memories over a shared love of sweet treats.
Section 3: Essential Ingredients for Homemade Brownies
Crafting the perfect brownie begins with selecting the right ingredients. While the basic components are simple, each plays a crucial role in achieving the desired flavor and texture.
3.1 Basic Ingredients
- Flour: All-purpose flour is the most commonly used, providing structure to the brownies.
- Cocoa powder: Unsweetened cocoa powder is essential for the rich chocolate flavor. Dutch-processed cocoa can also be used for a milder taste.
- Sugar: Granulated sugar adds sweetness and helps to create a fudgy texture.
- Eggs: Eggs contribute to moisture and richness, as well as aiding in binding the ingredients.
- Butter: Melted butter enhances flavor and contributes to the overall texture. You can also use substitutes like coconut oil.
- Vanilla extract: A small amount of vanilla extract amplifies the chocolate flavor, making it more complex.
- Salt: A dash of salt balances sweetness and enhances the flavors of the other ingredients.
3.2 Optional Add-ins
While basic brownies are delicious on their own, consider adding optional ingredients to elevate your bake:
- Chocolate chips: Semi-sweet or dark chocolate chips can be folded into the batter for extra chocolatey goodness.
- Nuts: Walnuts or pecans add a delightful crunch and nutty flavor.
- Swirls of caramel: Drizzling caramel sauce adds a luxurious twist.
- Flavor pairings: Consider adding mint extract or orange zest for unique flavor profiles.
Section 4: Detailed Homemade Brownie Recipe
4.1 Ingredients
- 1 cup all-purpose flour
- ½ cup unsweetened cocoa powder
- 1 cup granulated sugar
- 2 large eggs
- ½ cup melted butter
- 1 tsp vanilla extract
- ¼ tsp salt
- (Optional) ½ cup chocolate chips or nuts
4.2 Directions
- Preheat your oven to 350°F (175°C) and grease an 8×8-inch baking pan.
- In a mixing bowl, combine the flour, cocoa powder, and salt; set it aside.
- In another bowl, mix the melted butter and sugar until combined. Then add in the eggs and vanilla extract, mixing until smooth.
- Gradually fold the dry ingredients into the wet mixture until just combined. Avoid overmixing.
- If desired, fold in chocolate chips or nuts at this stage.
- Pour the batter into the prepared pan, spreading it evenly. Bake for 20-25 minutes, or until the edges are set but the center remains slightly soft.
- Allow brownies to cool in the pan for 10 minutes before transferring them to a wire rack to cool completely before cutting.
4.3 Baking Tips and Advice
- Fudgy brownies: To achieve a fudgy texture, slightly underbake the brownies; they will continue to set as they cool.
- Oven temperature: Make sure your oven is properly calibrated. An inaccurate oven temperature can affect baking times significantly.
- Storing brownies: Store brownies in an airtight container at room temperature for up to a week or refrigerate for extended freshness.
Section 5: Popular Variations of Brownies
5.1 Gluten-Free Brownies
Creating gluten-free brownies is easy with a few simple substitutions. Replace all-purpose flour with almond flour or coconut flour to maintain moisture and richness without gluten.
5.2 Vegan Brownies
To make vegan brownies, substitute eggs with flaxseed meal or applesauce, and use plant-based butter or coconut oil instead of regular butter. They are just as delicious!
5.3 Healthier Brownies
For a nutritious twist, experiment with black bean brownies, which use blended black beans to replace flour, yielding a rich, fudgy texture while boosting fiber content.
Section 6: Serving Suggestions and Pairings
6.1 Toppings
Enhance your brownies with delightful toppings such as:
- Whipped cream for a light and airy touch.
- Ice cream for indulgence, creating a delightful brownie sundae.
- Fresh fruit like raspberries or strawberries, adding a tart contrast.
- Chocolate or caramel sauces for extra sweetness and richness.
6.2 Beverage Pairings
Complement your brownies with the perfect beverage, such as:
- A rich cup of coffee to enhance the chocolate flavor.
- Milk, which balances the sweetness.
- A glass of dessert wine, which pairs beautifully with chocolate desserts.
Section 7: Common Mistakes to Avoid When Making Brownies
7.1 Overmixing vs. Undermixing
Understanding the right mix is crucial; overmixing can lead to tough brownies, while undermixing may result in uneven textures. Aim for a just-combined consistency.
7.2 Baking Time and Temperature
Brownies are done when the edges are set, and a toothpick inserted in the middle comes out with a few crumbs. Always keep an eye on baking times to avoid overbaking.
7.3 Cooling Process
Patience is key; allowing brownies to cool completely before cutting ensures clean edges and prevents them from becoming too crumbly.
Section 8: FAQs
8.1 Can I substitute ingredients in brownie recipes?
Yes, many ingredients can be substituted! For instance, you can use natural sweeteners instead of granulated sugar or swap almond flour for all-purpose flour in gluten-free recipes.
8.2 How do I store leftover brownies?
Store brownies in an airtight container at room temperature. They can also be refrigerated to extend freshness, but let them sit at room temperature before serving for optimal texture.
8.3 How do I know when my brownies are done?
Check for doneness by inserting a toothpick in the center; it should come out with a few moist crumbs. The edges should appear set, while the center remains slightly soft.
8.4 Can brownies be frozen?
Absolutely! Allow brownies to cool completely, then wrap them tightly in plastic wrap or foil and place them in an airtight container. They can be frozen for up to three months.
8.5 Are brownies better than cake?
This is subjective! Some prefer the dense and fudgy texture of brownies, while others appreciate the lightness of cake. It ultimately comes down to personal preference.
Conclusion
Recap of the joy of baking homemade brownies. Encouragement to experiment and share with others.
Homemade brownies
Equipment
- 1 8x8-inch baking pan
- 1 mixing bowls
- 1 whisk or electric mixer
- 1 rubber spatula
- 1 measuring cups and spoons
- 1 parchment paper (optional)
- 1 oven
Ingredients
- 1/2 cup unsalted butter
- 1 cup granulated sugar
- 2 large eggs
- 1 teaspoon vanilla extract
- 1/3 cup unsweetened cocoa powder
- 1/2 cup all-purpose flour
- 1/4 teaspoon salt
- 1/4 teaspoon baking powder
- 1/2 cup chocolate chips or nuts (optional) Add for extra texture and flavor.
Instructions
- Preheat the oven to 350°F (175°C). Grease the baking pan or line it with parchment paper for easy removal.
- In a medium microwave-safe bowl, melt the unsalted butter. This should take about 30-40 seconds in the microwave.
- Once melted, remove the bowl from the microwave and mix in the granulated sugar until well combined.
- Add the eggs, one at a time, mixing well after each addition. Then, stir in the vanilla extract.
- In a separate bowl, whisk together the cocoa powder, flour, salt, and baking powder.
- Gradually incorporate the dry ingredients into the wet mixture using a rubber spatula or wooden spoon. Mix until just combined; do not overmix.
- If desired, fold in chocolate chips or nuts for added texture and flavor.
- Pour the brownie batter into the prepared baking pan, spreading it evenly.
- Bake in the preheated oven for 20-25 minutes, or until a toothpick inserted in the center comes out with a few moist crumbs (but no wet batter).
- Let the brownies cool in the pan on a wire rack for about 10 minutes before slicing them into squares.