Delicious Red Velvet Cake Recipe: Bake the Perfect Classic Treat
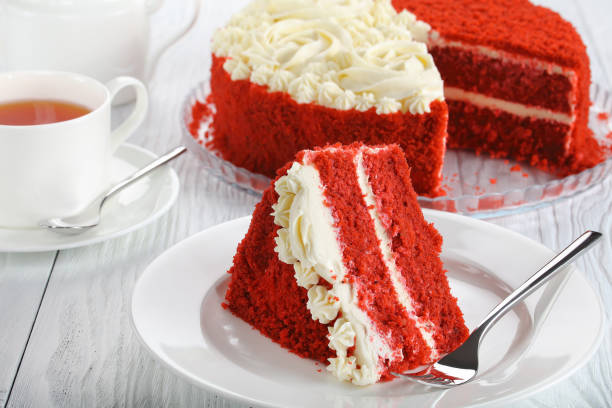
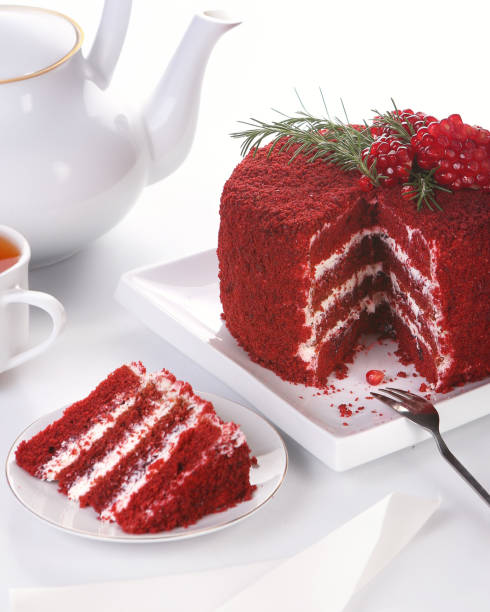
Red velvet cake, with its deep crimson hue and rich, velvety texture, has become a beloved dessert that graces tables for both special occasions and casual gatherings. Its unique flavor, a delightful combination of chocolate and tangy notes from buttermilk, has captivated taste buds and made it a popular choice in bakeries and kitchens alike. The striking appearance, often adorned with cream cheese frosting, further elevates its visual appeal, making it a standout dessert for celebrations such as birthdays and weddings.
Having a reliable recipe is essential for mastering this iconic cake. With numerous variations and techniques available, it can be easy to feel overwhelmed when attempting to recreate this classic treat. A dependable recipe not only ensures consistent results but also allows bakers of all skill levels to enjoy the satisfaction of producing an exquisite red velvet cake that rivals those found in professional bakeries.
In this article, readers can expect a comprehensive guide covering the history of red velvet cake, its unique characteristics, and a step-by-step recipe to create the perfect cake at home. Whether you’re a seasoned baker or a novice in the kitchen, this resource will equip you with the knowledge and skills needed to bring this iconic dessert to life. Get ready to indulge in the delicious world of red velvet cake!
History of Red Velvet Cake
The origins of red velvet cake can be traced back to the early 20th century, with its roots deeply embedded in the Southern United States. The cake is believed to have emerged during the Victorian era, when the utilization of cocoa powder became more widespread. During this time, the reaction between acidic ingredients like buttermilk and cocoa powder produced a reddish hue in chocolate cakes. However, it wasn’t until the 1920s that the cake gained popularity, particularly after a recipe appeared in a local cookbook in Texas.
The cake’s alluring color and luxurious texture quickly captured the attention of home bakers and dessert enthusiasts alike. By the 1930s, the cake was being featured under the name “red velvet” in various advertisements and cookbooks, often associated with the culinary prestige of upscale restaurants. The introduction of food coloring in recipes further enhanced the cake’s vibrant appearance, making it even more desirable in both home kitchens and patisseries.
Notably, red velvet cake carries cultural significance, especially in Southern cuisine. It became a staple for special occasions, including weddings and birthdays, symbolizing celebration and indulgence. By the turn of the 21st century, the cake had transcended regional boundaries, becoming a national favorite and a sought-after dessert across the globe. Today, its classic combination of flavors and stunning presentation continues to endear it to new generations of bakers and cake lovers alike.
Understanding Red Velvet Cake
At first glance, red velvet cake is striking not only for its color but also for its distinctive flavor profile. Central to its unique taste are the carefully selected ingredients that play an integral role in its development. The core components include all-purpose flour, cocoa powder, sugar, eggs, vegetable oil or melted butter, and buttermilk. The inclusion of buttermilk is particularly crucial, as it adds a subtle tanginess that balances the sweetness while also contributing to the cake’s moist texture.
The cocoa powder used in red velvet cake is typically a mild variety, providing a gentle chocolate flavor without overpowering the overall profile. This delicate balance allows for the characteristic taste of red velvet to emerge — a tantalizing fusion of chocolatey undertones and a hint of acidity from the buttermilk. Additionally, bakers often use red food coloring to enhance the cake’s vibrant hue, elevating both its aesthetic appeal and its recognizability as a red velvet treat.
The texture of red velvet cake is another key aspect that sets it apart from other cakes. The interplay of ingredients not only ensures a tender crumb but also results in a velvety, smooth mouthfeel that has made it a favorite among cake enthusiasts. This unique combination of flavors and textures results in a dessert that is both delectable and memorable, making red velvet cake deserving of its revered status in the culinary world.
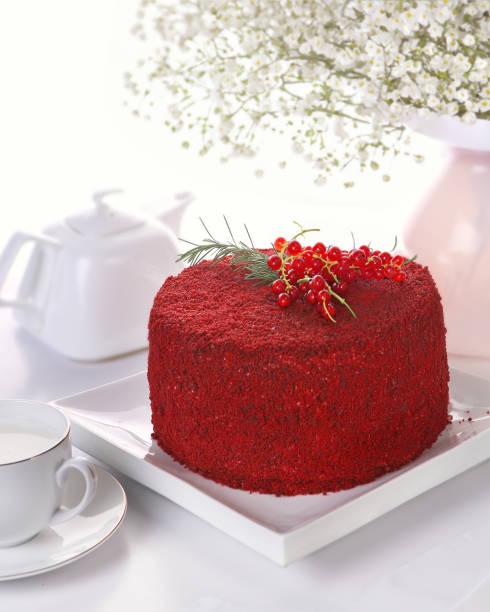
Recipe Overview
Now that we’ve explored the rich history and unique characteristics of red velvet cake, it’s time to dive into the recipe itself. A well-constructed recipe will guide you through the essential steps required to create a delicious red velvet cake from the comfort of your own kitchen. Before you begin, here are a few tips to prepare:
- Gather all your ingredients and tools to streamline the baking process.
- Preheat your oven and prepare your cake pans in advance.
- Read through the entire recipe to familiarize yourself with each step.
Detailed Red Velvet Cake Recipe
Ingredients
To create a classic red velvet cake, you’ll need the following ingredients:
- For the cake:
- 2 ½ cups all-purpose flour
- 1 ½ cups granulated sugar
- 1 cup vegetable oil
- 1 cup buttermilk, room temperature
- 3 large eggs, room temperature
- 2 tablespoons unsweetened cocoa powder
- 1 teaspoon baking soda
- 1 teaspoon white vinegar
- 1 teaspoon vanilla extract
- 1 to 2 teaspoons red food coloring (adjust for desired color)
- For the cream cheese frosting:
- 1 cup unsalted butter, softened
- 8 oz cream cheese, softened
- 4 cups powdered sugar
- 1 teaspoon vanilla extract
Note: If you need alternatives, you can use almond milk mixed with vinegar as a buttermilk substitute or explore gluten-free flour blends if needed.
Directions
- Prepping the Oven and Pans: Preheat your oven to 350°F (175°C). Grease two 9-inch round cake pans and line the bottoms with parchment paper for easy removal.
- Making the Cake Batter:
- In a large bowl, sift together the flour, cocoa powder, baking soda, and salt.
- In another bowl, whisk together the sugar, oil, buttermilk, eggs, vanilla extract, and red food coloring.
- Gradually add the dry ingredients to the wet mixture, stirring until just combined.
- Finally, mix in the vinegar, which will react with the baking soda and create that signature fluffiness.
- Baking the Cake: Divide the batter evenly between the prepared pans. Bake for 25-30 minutes or until a toothpick inserted into the center comes out clean.
- Cooling the Cake: Allow the cakes to cool in the pans for about 10 minutes before transferring them to a wire rack to cool completely. This is important for proper assembly later.
- Making the Frosting:
- In a mixing bowl, beat the softened butter and cream cheese together until smooth and creamy.
- Gradually add the powdered sugar and vanilla extract, beating until fluffy and well combined.
- Assembling the Cake: Once the cakes are completely cool, place one layer on a serving platter. Spread a layer of cream cheese frosting on top, then place the second layer on top of the first. Frost the top and sides of the cake, smoothing it out as desired. To elevate your presentation, consider adding decorative elements such as sprinkles or fresh berries.
Baking Tips
To ensure your red velvet cake is a success, keep the following tips in mind:
- Aim to properly measure your ingredients to avoid inconsistency in texture.
- Be cautious not to overmix the batter, as this can lead to a denser cake.
- Store leftover cake in an airtight container in the refrigerator for up to 3 days, or freeze it for longer storage.
- Consider pairing your red velvet cake with coffee or tea for a delightful contrast of flavors.
Variations on Red Velvet Cake
While the classic red velvet cake is a favorite, there are several delicious variations you can try:
- Gluten-free red velvet cake: Substitute regular flour with gluten-free flour blends to make a gluten-free version.
- Vegan red velvet cake alternatives: Use flax eggs, plant-based milk, and vegan butter to create a vegan-friendly treat.
- Red velvet cake cupcakes: Transform the classic cake into cupcakes for smaller, portioned treats.
- Red velvet cake in dessert bars: Bake the cake in a pan and cut it into bars for a different serving style.
FAQs
What is the origin of red velvet cake?
The origins of red velvet cake can be traced back to early 20th century Southern United States, with significant popularity developments in the 1920s and 1930s.
Can I use natural cocoa powder instead of Dutch-processed for red velvet?
While you can use natural cocoa powder, it may affect the cake’s overall flavor and color. Dutch-processed cocoa provides a milder taste and a deeper color.
How do I prevent my red velvet cake from being dry?
Ensure not to overbake the cake and maintain the moisture balance by using buttermilk. Always check for doneness a few minutes before the suggested baking time.
Why does red velvet cake taste like chocolate?
The subtle chocolate flavor comes from the cocoa powder used in the batter, although it is mild and complemented by the buttermilk’s tanginess.
What can I use instead of buttermilk in a red velvet recipe?
You can create a buttermilk substitute by mixing regular milk with a tablespoon of vinegar or lemon juice and allowing it to sit for about 5-10 minutes.
Conclusion
With its rich history, unique taste, and vibrant appearance, red velvet cake is truly a beloved dessert. By following this comprehensive recipe and tips, you’re on your way to impressing your friends and family with your baking skills. Don’t hesitate to experiment with variations and share your delicious creations!
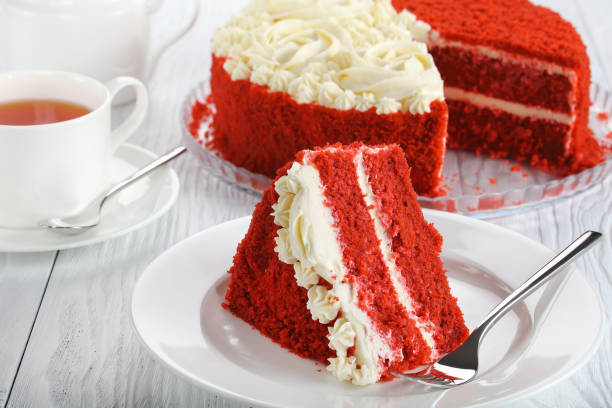
red velvet cake recipe
Equipment
- 2 round cake pans (9-inch)
- multiple mixing bowls
- 1 electric mixer or whisk
- 1 set measuring cups and spoons
- 1 rubber spatula
- 1 cooling rack
- 1 sifter
- 1 plastic wrap
Ingredients
- 2 ½ cups all-purpose flour
- 1 ½ cups granulated sugar
- 1 cup vegetable oil
- 1 cup buttermilk, room temperature
- 2 large eggs
- 2 tablespoons red food coloring
- 1 teaspoon vanilla extract
- 1 teaspoon baking soda
- 1 teaspoon white vinegar
- 1 teaspoon salt
- 1 tablespoon unsweetened cocoa powder
- 8 ounces cream cheese, softened
- ½ cup unsalted butter, softened
- 4 cups powdered sugar
- 1 teaspoon vanilla extract
- 2-3 tablespoons milk (optional, for consistency)
Instructions
- Preheat the oven to 350°F (175°C). Grease and flour the two round cake pans.
- In a mixing bowl, combine the flour, sugar, cocoa powder, and salt. Mix well and set aside.
- In another bowl, add the vegetable oil, buttermilk, eggs, red food coloring, and vanilla extract. Whisk until fully combined.
- Gradually add the wet ingredients to the dry ingredients, mixing on medium speed until smooth.
- In a small bowl, combine the baking soda and vinegar. Add this mixture to the cake batter, mixing until just combined.
- Divide the batter evenly between the prepared cake pans and smooth the tops with a spatula.
- Bake in the preheated oven for 25-30 minutes, or until a toothpick inserted into the center comes out clean.
- Remove the cakes from the oven and allow them to cool in the pans for 10 minutes before transferring them to a cooling rack to cool completely.
- While the cakes are cooling, prepare the cream cheese frosting. In a mixing bowl, beat together the softened cream cheese and butter until creamy.
- Gradually add the powdered sugar and vanilla extract, mixing until the frosting is smooth and fluffy. Add milk as needed for desired consistency.
- Once the cakes are completely cooled, place one layer on a serving plate and spread a layer of frosting on top. Place the second layer on top and frost the top and sides of the cake.
- Optional: Decorate with sprinkles or additional decorations as desired.

