Red Velvet Cupcakes: Ultimate Guide to Recipe and Tips
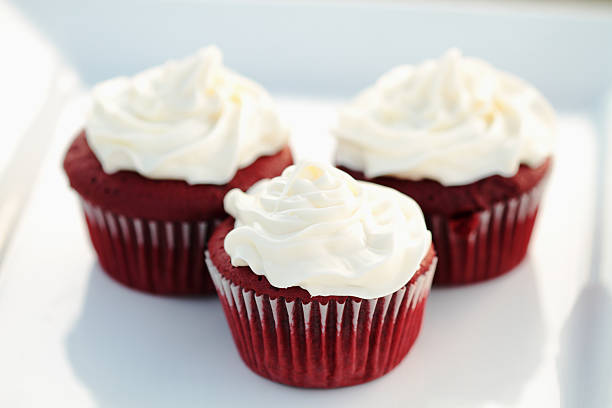
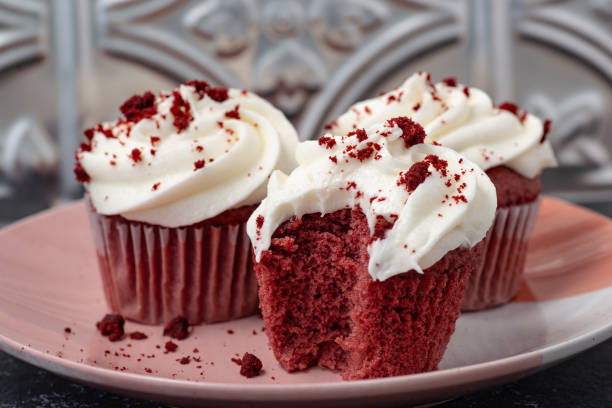
Red velvet cupcakes are a delightful and visually striking treat, beloved for their rich, crimson hue and velvety texture. Often associated with special occasions and celebrations, these cupcakes combine a unique flavor profile that blends hints of cocoa with a tangy sweetness, creating a dessert that is both indulgent and memorable. The allure of red velvet cupcakes lies not only in their taste but also in their stunning appearance, typically adorned with a luscious cream cheese frosting that complements their flavor perfectly.
The popularity of red velvet cupcakes has surged in recent years, transcending their traditional Southern roots to become a staple in bakeries and home kitchens around the globe. Their vibrant color and distinct flavor have made them a favorite for parties, weddings, and other festive events. As more people seek to recreate this iconic dessert, understanding the history, ingredients, and baking techniques behind red velvet cupcakes becomes increasingly important.
In this article, readers will embark on a journey through the fascinating history of red velvet cake, explore the key ingredients that make these cupcakes so special, and gain insight into the science of baking them to perfection. Additionally, a step-by-step recipe will guide you through the process of creating your own batch of red velvet cupcakes, including tips for frosting and troubleshooting. Whether you’re a seasoned baker or a curious novice, this comprehensive guide will equip you with the knowledge and confidence to master this beloved treat.
History of Red Velvet Cake
The origins of red velvet cake can be traced back to the Victorian era, a time when elaborate and ornate desserts were a hallmark of culinary artistry. The cake’s unique texture and flavor began gaining popularity due to its rich color and luxurious taste. During the 1920s, it became a staple in upscale dining establishments and was often associated with special occasions and celebrations.
Its connection to Southern cuisine also played a pivotal role in its popularity, as the cake was frequently featured in family gatherings and local baking competitions. The Southern tradition of baking cakes with distinctive textures and flavors laid the groundwork for the red velvet cake we know today. Additionally, the use of buttermilk and vinegar not only enhanced the cake’s flavor but also contributed to its tender crumb, making it a beloved dessert in many households.
As the culinary world evolved, so did red velvet cake. With the rise of the modern cupcake trend in the 21st century, the recipe was adapted into convenient cupcake form. This transformation allowed the charming dessert to become even more accessible, and its striking appearance captured the hearts of dessert lovers everywhere. Today, red velvet cupcakes are a favorite at bakeries, cafes, and home kitchens, symbolizing indulgence and celebration.
Ingredients Breakdown
Crafting the perfect red velvet cupcake hinges on a harmonious balance of key ingredients, each contributing to its iconic flavor and texture. Here’s a closer look at the essential components:
- All-purpose flour: The foundation of the cupcake, providing structure and stability.
- Cocoa powder: Offers a subtle chocolaty flavor that complements the sweetness of the cake.
- Red food coloring vs. natural alternatives: While vibrant red food coloring is traditional, natural alternatives like beet juice or pomegranate can be used for a more natural approach.
- Buttermilk: This ingredient is crucial for achieving the cupcakes’ moist texture and tangy flavor.
- Eggs: They bind the ingredients together and help create a light, airy texture.
- Butter vs. oil: While butter adds flavor, oil produces a more moist cupcake. Many recipes call for a combination of both.
In addition to these staples, optional ingredients can elevate the flavor:
- Vanilla extract: Enhances the overall flavor and adds depth.
- Salt: Essential for balancing sweetness and enhancing the other flavors.
Understanding these ingredients and their roles will help bakers create the perfect batch of red velvet cupcakes that are not only delicious but also visually stunning.
The Science of Baking Red Velvet Cupcakes
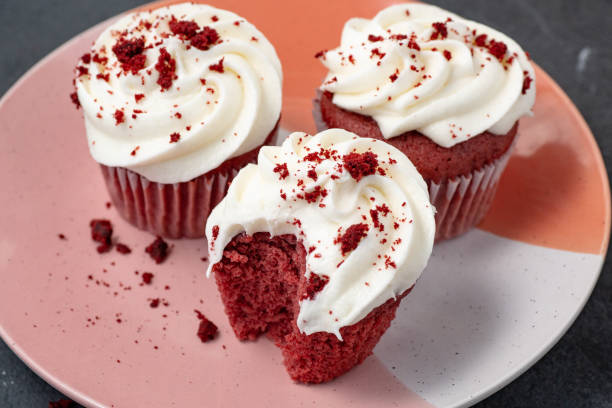
Baking is as much a science as it is an art, and understanding the chemistry behind red velvet cupcakes can elevate your baking to new heights. One of the core concepts in baking is gluten development. Gluten, formed when flour is mixed with liquid, provides structure to the cupcakes. While a certain amount of gluten is essential for stability, overmixing can lead to tough cupcakes. That’s why it’s important to mix the batter just until combined, ensuring a tender texture.
The role of acidic ingredients, particularly buttermilk and vinegar, is crucial in red velvet cupcakes. These acids not only add a distinctive tang but also react with baking soda to create carbon dioxide bubbles, which help the cupcakes rise. This reaction contributes to the light and airy texture that is characteristic of red velvet cupcakes.
Another important distinction in the baking process is the use of baking soda versus baking powder. While both are leavening agents, baking soda is a base that requires an acidic ingredient to activate. In red velvet cupcakes, the buttermilk and vinegar serve this purpose. Baking powder, on the other hand, contains both an acid and a base and can activate with moisture alone. Understanding these differences will help you choose the correct leavening agent in your baking endeavors.
Lastly, the interaction of food coloring with other ingredients can impact the final appearance of the cupcakes. The combination of acidic and alkaline elements in the batter can alter the shade of red, leading to variations in color intensity. Therefore, it’s important to use high-quality food coloring for the most vibrant results.
Step-by-Step Red Velvet Cupcake Recipe
Ingredients
- Cupcake Batter:
- 2 cups all-purpose flour
- 1 tablespoon cocoa powder
- 1 teaspoon baking soda
- 1 teaspoon salt
- 1 cup vegetable oil (or unsalted butter)
- 1 cup granulated sugar
- 1 cup buttermilk, room temperature
- 2 large eggs, room temperature
- 2 tablespoons red food coloring
- 1 teaspoon vanilla extract
- 1 teaspoon white vinegar
Directions
- Preheat Oven and Prepare Pan: Preheat the oven to 350°F (175°C) and line a muffin pan with cupcake liners.
- Mix Dry Ingredients: In a medium bowl, sift together flour, cocoa powder, baking soda, and salt.
- Combine Wet Ingredients: In a separate bowl, mix the oil, sugar, and eggs until smooth. Add buttermilk, food coloring, vanilla extract, and vinegar to the wet mixture.
- Combine Wet and Dry Mixtures: Gradually add dry ingredients to the wet mixture, stirring until just combined.
- Fill Cupcake Liners: Divide the batter evenly among the lined cupcake cups.
- Bake: Bake for 18-20 minutes or until a toothpick inserted comes out clean.
- Cool: Let cupcakes cool in the pan for a few minutes, then transfer them to a wire rack to cool completely.
- Frosting (optional): Cream cheese frosting or Italian meringue buttercream pairing suggestions can enhance the flavor.
Troubleshooting Tips
- Common Issues: Overmixing can lead to dense cupcakes, while underbaking may result in a gooey center.
- Adjusting Baking Times: Different ovens may require slight modifications in baking time, so check for doneness with a toothpick.
- Butter vs. Oil: Understand how these fats affect texture and taste; butter adds richness while oil keeps cupcakes moist.
Frosting Ideas and Variations
Frosting can elevate red velvet cupcakes even further, offering various flavors and styles to complement their rich texture. Here are some popular frosting ideas:
- Traditional Cream Cheese Frosting: A classic pairing, cream cheese frosting is tangy and sweet, creating a delightful contrast to the cupcakes. Simply blend 8 oz of cream cheese, 1/2 cup of unsalted butter, 4 cups of powdered sugar, and 1 tsp of vanilla extract until smooth.
- Chocolate Frosting: Add a twist by incorporating cocoa powder into your frosting. Mix 1/2 cup of unsweetened cocoa powder with your standard buttercream recipe for a rich chocolate flavor.
- Alternative Vegan Frosting Options: For those seeking non-dairy options, consider making frosting with coconut cream or avocado. These alternatives can provide rich flavors without the use of animal products.
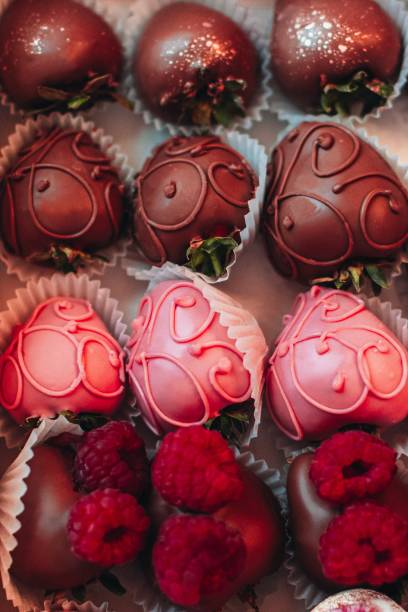
For an aesthetically pleasing presentation, consider decorating your cupcakes with sprinkles, edible glitter, or fresh raspberries. These additions not only enhance visual appeal but also offer a delightful flavor contrast.
Serving and Storage Tips
Red velvet cupcakes can be enjoyed on their own or paired with beverages such as coffee, tea, or a glass of milk. Their rich flavor profile complements a wide range of drinks, making them a versatile dessert option.
When it comes to storage, ensure that cupcakes are kept in an airtight container to maintain freshness. They can be stored at room temperature for up to 2 days. For longer preservation, consider freezing them. Simply wrap individually in plastic wrap and then place in an airtight container or freezer bag. They can be frozen for up to 3 months. To serve, allow them to thaw at room temperature before enjoying.
The shelf life of red velvet cupcakes is generally around 3-5 days, depending on ingredients and storage conditions. Look for signs of spoilage, such as excessive dryness, altered color, or unpleasant odor, to determine freshness.
Nutritional Information
When indulging in red velvet cupcakes, it helps to be aware of their nutritional content. On average, a standard red velvet cupcake may contain around 300 calories, with varying amounts of fat, carbohydrates, and sugar based on the recipe.
For those looking to make healthier substitutions, options like reducing sugar, using whole wheat flour, or substituting Greek yogurt for buttermilk can be explored. Additionally, gluten-free alternatives can easily be used to make this beloved treat suitable for those with dietary restrictions.
FAQs
- What is the difference between red velvet and regular chocolate cupcakes? Red velvet cupcakes have a distinct tanginess due to buttermilk and vinegar, along with a subtle cocoa flavor, whereas regular chocolate cupcakes focus more on chocolate sweetness.
- Can I use gel food coloring instead of liquid? Yes, gel food coloring provides a more vibrant color and requires less product to achieve the desired hue, making it an excellent choice for red velvet cupcakes.
- How do I ensure my cupcakes are moist? To maintain moisture, be cautious not to overbake and incorporate ingredients like buttermilk and oil that help create a tender crumb.
- Can I make red velvet cupcakes without buttermilk? If you don’t have buttermilk, you can create a substitute by mixing milk with vinegar or lemon juice, letting it sit for a few minutes before using.
- What is the origin of red velvet cake? Red velvet cake has roots in the Victorian era and gained popularity in the Southern United States, often featured in upscale dining and family gatherings.
- Should I refrigerate red velvet cupcakes? If frosted with cream cheese frosting, it’s best to refrigerate the cupcakes. Unfrosted, they can be stored at room temperature.
- How can I make these cupcakes gluten-free? Substitute regular flour with a gluten-free flour blend designed for baking, ensuring the right texture and taste.
Conclusion
Red velvet cupcakes hold a special place in the hearts of dessert enthusiasts, captivating us with their rich texture and eye-catching color. With newfound knowledge about their history, ingredients, and baking techniques, readers are empowered to create these delightful treats in their own kitchens. Whether trying the classic recipe or experimenting with variations, the joy of baking and savoring red velvet cupcakes is truly irresistible.
Call to Action
Don’t forget to subscribe for more delicious recipes and follow us on social media for the latest updates on our culinary adventures!
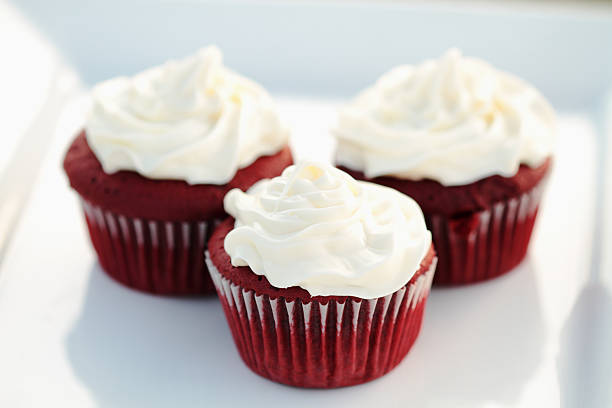
red velvet cupcakes
Equipment
- 1 muffin tin (12-cup)
- 12 cupcake liners
- 2 mixing bowls
- 1 electric mixer or whisk
- 1 rubber spatula
- 1 measuring cups
- 1 measuring spoons
- 1 cooling rack
- 1 piping bag (optional for frosting)
Ingredients
- 1 ½ cups all-purpose flour
- 1 cup granulated sugar
- ½ cup unsweetened cocoa powder
- 1 teaspoon baking soda
- ½ teaspoon salt
- 1 cup vegetable oil
- 1 cup buttermilk, room temperature Ensure room temperature for best results.
- 2 large eggs, room temperature Ensure room temperature for best results.
- 2 tablespoons red food coloring
- 1 teaspoon vanilla extract
- 1 teaspoon white vinegar
- 8 oz cream cheese, softened
- ½ cup unsalted butter, softened
- 4 cups powdered sugar
- 1 teaspoon vanilla extract
- 2 tablespoons milk, optional for consistency Use if a thinner consistency is desired.
Instructions
- Preheat the oven to 350°F (175°C) and line a 12-cup muffin tin with cupcake liners.
- In a large mixing bowl, sift together the flour, sugar, cocoa powder, baking soda, and salt. Set aside.
- In another bowl, mix together the vegetable oil, buttermilk, eggs, red food coloring, vanilla extract, and white vinegar until smooth.
- Gradually add the wet ingredients to the dry ingredients, mixing until just combined. Do not overmix.
- Divide the batter evenly among the cupcake liners, filling each about two-thirds full.
- Bake for 18-20 minutes, or until a toothpick inserted into the center comes out clean. Allow the cupcakes to cool in the pan for 5 minutes before transferring them to a cooling rack.
- While the cupcakes cool, make the cream cheese frosting by beating together the softened cream cheese and butter until light and fluffy.
- Gradually add the powdered sugar and mix until smooth. Stir in the vanilla extract and milk if a thinner consistency is desired.
- Once the cupcakes are completely cool, frost them with the cream cheese frosting using a piping bag or knife.
- For a decorative touch, sprinkle some edible glitter or red sprinkles on top of the frosting.

