
No-Bake Cherry Fudge: Easy Recipe for Delicious Desserts
No-bake desserts have become a beloved category among sweet enthusiasts, merging simplicity with delightful flavors. These desserts appeal to those who seek indulgent treats that can be prepared with minimal effort, making them perfect for both novice cooks and experienced bakers alike. One such delectable no-bake creation is cherry fudge—a rich, sweet confection that marries the tartness of cherries with the smoothness of chocolate. Its vibrant color and luscious texture not only tempt the taste buds but also make it a stunning addition to any dessert table.
In the realm of dessert-making, the importance of easy and quick recipes cannot be overstated. With busy lives and the constant hustle and bustle, more people are on the lookout for treats that can be whipped up in no time, without sacrificing flavor or presentation. No-bake cherry fudge checks all the boxes—delicious, visually appealing, and incredibly simple to prepare. Whether you’re planning a festive gathering, a summer barbecue, or simply looking to satisfy a sweet tooth, this delightful treat is sure to impress friends and family alike. Dive into the world of no-bake cherry fudge and discover a dessert that’s as fuss-free as it is fabulous!
What is No-Bake Cherry Fudge?
No-bake desserts are treats that require no oven time, allowing for quick and easy preparation that yields delicious results. They typically involve mixing ingredients together and chilling them until firm, making them accessible even to those who might not consider themselves skilled bakers. Among the many enticing options in this category, no-bake cherry fudge stands out as a delightful balance of creamy chocolate and tart cherries.
No-bake cherry fudge is characterized by its rich, velvety texture enhanced by the contrasting tartness of cherries. Typically made from a mixture of chocolate and sweetened condensed milk, it results in a fudge that is both sweet and satisfying. The vibrant, deep red hues of cherry pieces scattered throughout the fudge not only elevate its visual appeal but also make it a stunning centerpiece on any dessert table.
This confection is a popular choice for special occasions, such as holidays, birthdays, and summer BBQs. Its simplicity allows it to shine at casual gatherings and formal events alike, making it an ideal treat for any celebration. The ease of preparation combined with its impressive results has made cherry fudge a crowd-pleaser among dessert aficionados.
Why Choose No-Bake Cherry Fudge?
Choosing no-bake cherry fudge comes with an array of benefits that make it an ideal dessert option for busy individuals and families alike. First and foremost, the time-saving aspect is undeniable; preparing this fudge takes a fraction of the time that traditional baking requires. Since there is no need to preheat an oven or monitor baking times, you can whip up this delicious indulgence in no time at all.
Additionally, no-bake desserts require minimal equipment. With just a mixing bowl and a few basic kitchen tools, you can create a delightful treat without the need for specialized baking pans or complicated techniques. This is particularly beneficial during the warm summer months when turning on the oven can heat up your kitchen uncomfortably.
Beyond its practicality, no-bake cherry fudge is incredibly versatile. It offers numerous customization options, allowing you to get creative with various toppings or add-ins. Whether you prefer to keep it simple or elevate it with nuts, coconut flakes, or even a sprinkle of sea salt, the possibilities are endless. Furthermore, it can easily cater to different dietary preferences by using gluten-free or vegan ingredients, ensuring everyone can enjoy a piece of this delicious fudge.

Ingredients for No-Bake Cherry Fudge
Creating no-bake cherry fudge requires a few simple ingredients that come together to create a delightful treat. Below is a breakdown of the common ingredients used in this recipe, along with a closer look at the cherry additions.
Common Ingredients
- Dark chocolate or milk chocolate: The choice of chocolate can significantly impact flavor. Dark chocolate offers a richer, more intense taste, while milk chocolate provides a creamier, sweeter experience.
- Sweetened condensed milk: This ingredient serves as the base for the fudge, adding sweetness and creaminess that binds the chocolate and cherries together.
Cherry Additions
When it comes to adding cherries to the fudge, there are a couple of options to consider:
- Fresh cherries: Using fresh cherries provides a burst of tartness and a juicy texture, enhancing the overall flavor of the fudge.
- Maraschino cherries: These bright red cherries add a sweet and nostalgic flavor, making them a popular choice for many dessert recipes.
- Optional add-ins: Consider including nuts, coconut flakes, or even a sprinkle of sea salt to elevate the taste and texture of your fudge.
Step-by-Step Recipe for No-Bake Cherry Fudge
Ingredients List
To prepare no-bake cherry fudge, gather the following ingredients:
- 2 cups of chocolate (dark or milk, chopped or chips)
- 1 can (14 ounces) of sweetened condensed milk
- 1 cup of pitted cherries (fresh or maraschino, chopped)
- A pinch of salt (optional)
- Additional toppings (optional, such as nuts or coconut flakes)
Directions
- Preparation of the pan: Start by lining an 8×8 inch baking pan with parchment paper or greasing it lightly to prevent sticking.
- Melting chocolate: In a medium saucepan over low heat, combine the chocolate and sweetened condensed milk. Stir continuously until the chocolate is melted and smooth.
- Adding cherry pieces: Remove the saucepan from heat and gently fold in the chopped cherry pieces, ensuring they are evenly distributed throughout the mixture.
- Mixing and pouring: Carefully pour the fudge mixture into the prepared pan, spreading it evenly with a spatula.
- Setting time: Refrigerate the fudge for at least 3-4 hours, or until it is firm enough to cut into squares.
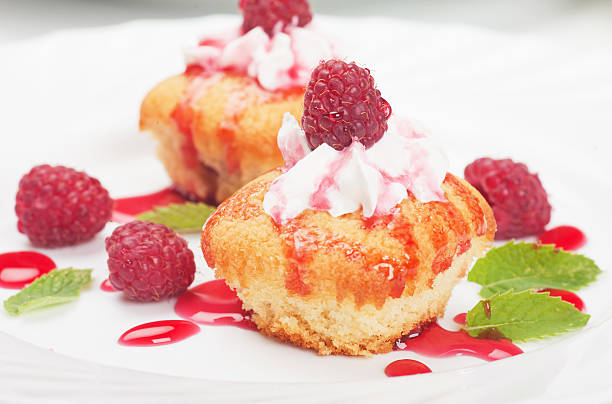
- Cutting and serving suggestions: Once set, lift the fudge out of the pan using the parchment paper edges, slice it into squares, and serve. Consider pairing it with a dollop of whipped cream or a scoop of vanilla ice cream for added indulgence.
Advice for Perfect Fudge
To achieve the right consistency, ensure that the chocolate is melted slowly to prevent burning. Additionally, for best freshness, store the fudge in an airtight container in the refrigerator, where it can last for up to two weeks.
Popular Variations of No-Bake Cherry Fudge
Cherry Almond Fudge
For a delightful twist, try adding almond extract and chopped almonds to the base fudge mixture. The nutty flavor pairs surprisingly well with cherries and chocolate, creating a unique and delicious dessert.
Chocolate Mint Cherry Fudge
Add a refreshing touch by incorporating peppermint extract into the fudge mixture. The combination of chocolate, cherries, and mint creates an indulgent yet invigorating treat perfect for special occasions.
Vegan No-Bake Cherry Fudge
To cater to dietary preferences, substitute traditional ingredients for vegan-friendly options. Use dairy-free chocolate and coconut cream instead of sweetened condensed milk for a delicious vegan version everyone can enjoy.
Serving Suggestions
No-bake cherry fudge is not only a treat on its own but it also pairs beautifully with various accompaniments. Here are some serving suggestions:
- Ice cream: Serve your fudge alongside a scoop of vanilla or chocolate ice cream for a classic dessert experience.
- Whipped cream: A dollop of whipped cream can enhance the presentation and add a light, airy texture to each bite.
This luscious fudge is perfect for a range of events, including holiday parties, birthdays, or casual summer gatherings, adding an elegant touch to any dessert table.
Storing No-Bake Cherry Fudge
Short-Term Storage
For short-term storage, keep your no-bake cherry fudge in an airtight container at room temperature for a few days. However, for longer freshness, it’s best to refrigerate the fudge, where it can stay fresh for up to two weeks.
Long-Term Storage
To extend the life of your fudge, consider freezing it. Wrap it tightly in plastic wrap and place it in a freezer-safe container. When you’re ready to enjoy, thaw it in the refrigerator overnight for the best flavor and texture.
FAQs
What can I use instead of sweetened condensed milk?
If you need a substitute for sweetened condensed milk, consider using coconut cream or a homemade version made by simmering milk with sugar to thicken and sweeten it.
Can I use frozen cherries instead of fresh for the fudge?
Yes, frozen cherries can be used in place of fresh cherries. Just ensure they are thawed and drained before adding them to the fudge mixture to avoid excess moisture.
How long will no-bake cherry fudge last?
When stored properly in an airtight container, no-bake cherry fudge can last for up to two weeks in the refrigerator and up to three months in the freezer.
Can I add other flavors or spices to the fudge?
Absolutely! Feel free to experiment with different flavors such as vanilla extract, or spices like cinnamon or nutmeg, to create your own unique twist on this classic treat.
Conclusion
Emphasizing the joy of both flavor and simplicity, no-bake cherry fudge is a treat that everyone can appreciate. Its ease of preparation, customization options, and vibrant appearance make it a perfect addition to any dessert table.
Call to Action
We invite you to share your experiences with our no-bake cherry fudge recipe! If you enjoyed this article, subscribe for more delicious no-bake recipes to try in your kitchen.
No-Bake Cherry Fudge
Equipment
- 1 mixing bowl
- 1 8x8 inch baking dish
- 1 parchment paper
- 1 spatula
- 1 microwave-safe bowl (or double boiler)
Ingredients
- 6 oz semi-sweet chocolate chips
- 4 oz sweetened condensed milk
- 1 teaspoon vanilla extract
- 1 cup dried cherries, chopped
- 1/2 cup walnuts, chopped optional
- pinch pinch salt
Instructions
- Line the baking dish with parchment paper, leaving some overhang for easy removal later.
- In a microwave-safe bowl, combine the semi-sweet chocolate chips and sweetened condensed milk.
- Microwave the mixture in 30-second intervals, stirring between each, until fully melted and smooth. This should take about 1-2 minutes.
- Once melted, stir in the vanilla extract and a pinch of salt until well combined.
- Fold in the chopped dried cherries and walnuts (if using) until evenly distributed in the chocolate mixture.
- Pour the fudge mixture into the prepared baking dish and spread it out evenly with a spatula.
- Refrigerate the fudge for about 1 hour or until firm.
- Once set, lift the fudge from the dish using the parchment paper overhang and cut it into squares using a knife.