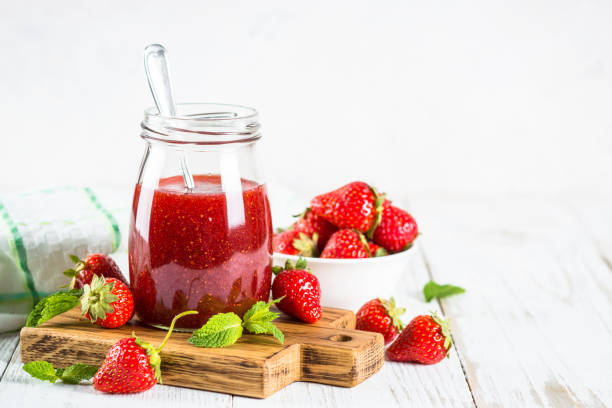
Homemade Strawberry Jam: A Complete Guide to Perfection
Strawberry jam is a beloved staple in many households, cherished not only for its delightful sweetness but also for its versatility in a variety of culinary applications. Whether spread on a warm slice of toast, swirled into yogurt, or used as a filling for pastries, strawberry jam brings a taste of summer to every bite. While store-bought varieties can easily be found on grocery shelves, there’s something uniquely satisfying about creating your own homemade version. The process of making strawberry jam at home allows for a personal touch and customization that is often missing from mass-produced products. Moreover, crafting your own jam can evoke a sense of accomplishment and nostalgia, connecting you to traditions passed down through generations. The vibrant color, fresh aroma, and rich flavor of homemade strawberry jam far surpass anything found in a jar from the store, making it not just a treat for your taste buds but also a heartwarming experience.
As you venture into the realm of homemade strawberry jam, you’ll discover not only the joys of delicious results but also the advantages of using fresh, wholesome ingredients that reflect your personal taste. The following sections will guide you through the benefits of making jam at home, necessary ingredients, equipment needed, and a step-by-step recipe to help you create your very own batch of this sweet delight.
Benefits of Making Strawberry Jam at Home
Making strawberry jam at home offers numerous advantages that go far beyond just the delicious taste. One immediate benefit is the ability to use healthier ingredients. When you create your own jam, you have complete control over what goes into it, allowing you to choose fresh, organic strawberries and limit the sugar if desired. This can significantly enhance the jam’s nutritional profile compared to many store-bought varieties that often contain high amounts of sugar and artificial ingredients.
Additionally, making your own jam gives you total control over sweetness and texture. Whether you prefer a sweeter jam or a more tart version, you can adjust the sugar to match your tastes. Similarly, you can decide on the chunky or smooth consistency, catering it exactly to your preference.
Another compelling reason to make strawberry jam at home is to avoid preservatives and additives. Many commercial jams contain added chemicals to prolong shelf life; however, homemade versions can be made simply with natural ingredients, providing peace of mind along with great flavor.
From an economic perspective, preparing your own strawberry jam can also be a cost-effective choice, especially if you’re utilizing berries that are in season or harvested from a garden. This not only reduces the cost but focuses on reducing waste, as homemade jam can be stored for long periods.
Finally, homemade strawberry jam makes for a thoughtful gift idea. A jar of beautifully presented jam can evoke warmth and connection when shared with family, friends, or even as a gesture in hosting, showcasing the effort put into crafting something special.
Essential Ingredients for Homemade Strawberry Jam
To whip up a delightful batch of homemade strawberry jam, you’ll need just a handful of essential ingredients that come together to create this iconic spread. First and foremost, fresh strawberries are the star of the show. Look for ripe, fragrant berries that are vivid in color, as they will contribute to a sweet and flavorful jam.
Next on the list is sugar, which acts as both a sweetener and a preservative, balancing the tartness of the strawberries. The quantity can vary based on personal preference and the natural sweetness of the fruit.
Pectin is another crucial ingredient. It helps the jam achieve its signature gel-like consistency, ensuring it sets properly when cooled. You can find pectin in powder or liquid form at most grocery stores.
Lemon juice is vital as it enhances the flavor and helps to preserve the jam. The acidity from the lemon balances the sweetness and contributes to the overall flavor profile.
Lastly, feel free to experiment with optional ingredients for added flavor, such as a touch of vanilla, fresh herbs like basil, or even a hint of balsamic vinegar to create more complex and unique flavor combinations. These additions can elevate your homemade jam to a new level of deliciousness.
Equipment Needed
To create your homemade strawberry jam, you’ll need some essential equipment to ensure the process runs smoothly and safely. The following items will help you achieve the best results:
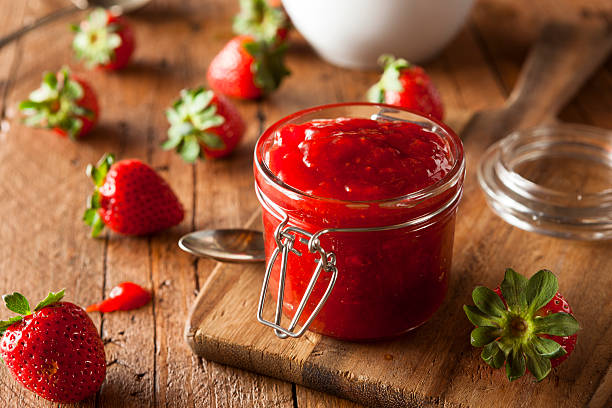
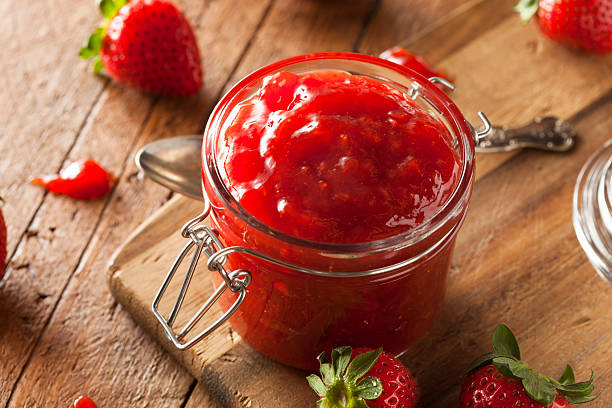
- Jars and Lids: Choose glass jars that are specifically designed for canning. Ensure that the lids can create a proper seal.
- Large Pot: A heavy-bottomed pot is ideal for cooking the strawberries and sugar together. It should have enough capacity to hold the mixture without overflowing.
- Canning Utensils: Essential tools include a jar lifter, funnel, and canning tongs to assist in filling and sealing your jars safely.
- Stove and Heat Source: A reliable stove is necessary for boiling the jam and processing the jars.
- Thermometer: A candy or jam thermometer will help you monitor the temperature to ensure the jam reaches the desired consistency.
Recipe: How to Make Homemade Strawberry Jam
Ingredients
- 2 pounds fresh strawberries
- 4 cups sugar
- 1/4 cup lemon juice
- 1 package pectin (1.75 oz)
Directions
1. Prepare the Strawberries: Begin by washing the strawberries under cool running water. Hull and chop them into small pieces. Squeeze the lemon juice over the strawberries to add acidity, which will enhance their flavor and assist in preservation.
2. Cook the Strawberries: In a large pot, combine the chopped strawberries and sugar. Stir the mixture well and let it sit for about 10 minutes. This resting time allows the strawberries to release their juices, creating a syrupy base to work with.
3. Add Pectin: After the strawberries have released their juices, stir in the pectin. Place the pot on the stove over medium-high heat and bring the mixture to a full boil, stirring constantly to prevent sticking.
4. Boil and Stir: Once boiling, continue stirring constantly for 1-2 minutes. You can perform a gel test by placing a spoonful of the mixture on a cold plate to check the consistency. If it gels, your jam is ready to be jarred.
5. Can the Jam: Before canning, ensure your jars and lids are properly sterilized by boiling them in water for at least 10 minutes. Pour the hot jam into the sterilized jars, leaving about 1/4 inch of headspace at the top. Secure the lids and process the jars in a boiling water bath for 10-15 minutes to create a vacuum seal.
Tips for Perfect Strawberry Jam
- Use ripe strawberries for the best flavor and sweetness.
- Adjust the sugar based on your taste preference, but be mindful of how this will affect the pectin.
- Perform gel tests during the cooking process to avoid overcooking the jam.
Common Mistakes to Avoid
While making strawberry jam can be a straightforward process, some common pitfalls can affect the outcome:
- Using Overripe or Underripe Strawberries: Make sure to select strawberries that are perfectly ripe; overripe ones may lead to a mushy texture, while underripe berries can result in a tart jam.
- Incorrect Sugar/Pectin Ratios: Each recipe has specific ratios; deviating from these can affect the jam’s ability to set properly.
- Not Sterilizing Jars Properly: Ensure jars and lids are sanitized before filling to prevent spoilage.
- Overboiling or Underboiling: Be vigilant about the boiling time; overboiling can cause the jam to become too thick, while underboiling may lead to a runny texture.
- Neglecting to Follow Proper Canning Procedures: Stick to the recommended canning guidelines to ensure the safety and longevity of your jam.
Storing and Preserving Your Jam
Proper storage is essential in maintaining the quality of your homemade strawberry jam. Here are some tips to keep in mind:
- Short-term vs. Long-term Storage: If you plan to consume your jam within a few weeks, refrigeration is sufficient. For long-term storage, opt for canning.
- Refrigeration Methods: Store opened jars in the refrigerator and consume within 3 weeks for the best flavor and texture.
- Water Bath Canning Process: This method not only preserves the jam but also ensures it lasts for up to one year. Remember to follow all canning instructions carefully.
- Signs of Spoilage: Always check for changes in color, texture, or odor. If you observe any sign of spoilage, discard the jam immediately.
Variations of Strawberry Jam
Once you master traditional strawberry jam, consider experimenting with these exciting variations:
- Strawberry-Basil Jam: Infuse your jam with fresh basil leaves during cooking for a unique herbal twist.
- Strawberry-Rhubarb Jam: Mix in chopped rhubarb for a delightful tartness that pairs beautifully with strawberries.
- Spiced Strawberry Jam: Incorporate warming spices such as cinnamon or nutmeg to create a comforting, seasonal jam.
- Balsamic Strawberry Jam: A splash of balsamic vinegar adds depth and a complex flavor profile that elevates the traditional recipe.
FAQs
1. Can I use frozen strawberries for making jam? Yes, frozen strawberries can be used, but they may result in a different texture and slightly altered flavor.
2. What type of sugar is best for strawberry jam? Granulated sugar is typically used, but you can experiment with alternatives like brown sugar for added depth in flavor.
3. How long does homemade strawberry jam last? When stored properly in sterilized jars, it can last up to one year.
4. Do I need to use pectin? Pectin is not strictly necessary, but it helps achieve the desired gel consistency that many prefer.
5. Can I can my jam without a water bath? A water bath is recommended to safely preserve homemade jam and prevent spoilage.
Conclusion
Making strawberry jam at home is a rewarding culinary adventure that brings joy and flavor into your kitchen. Embrace the opportunity to experiment with flavors and recipes, and enjoy the satisfaction of sharing your homemade creations with family and friends.

Homemade Strawberry Jam
Equipment
- 1 large pot
- 1 wooden spoon or spatula
- 1 potato masher (optional)
- 1 ladle
- 1 sterilized jar for storing
Ingredients
- 2 pounds fresh strawberries Wash thoroughly and remove stems.
- 1 ½ cups granulated sugar Adjust to taste if desired.
- 1 tablespoon lemon juice
- ¼ teaspoon salt
Instructions
- Begin by washing the strawberries thoroughly under cool water. Remove the stems and any bruised parts.
- Place the strawberries in a large pot and mash them with a potato masher for a chunkier texture. If you prefer smoother jam, you can leave some strawberries whole.
- Add the granulated sugar, lemon juice, and salt to the pot with the strawberries. Stir well to combine.
- Cook the mixture over medium heat, stirring frequently until the sugar dissolves.
- Increase the heat to medium-high and bring the mixture to a rolling boil. Cook for about 15-20 minutes, stirring occasionally, until the jam thickens.
- Once the jam has reached the desired consistency, remove the pot from the heat.
- Carefully ladle the hot jam into the sterilized jar, leaving a small amount of space at the top.
- Seal the jar with a lid and let it cool to room temperature before storing it in the refrigerator.
- This jam can be stored in the refrigerator for up to 2-3 weeks or processed for longer storage using canning methods.
- Feel free to adjust sweetness by reducing or increasing the amount of sugar to suit your taste.
- Experiment with other fruits like raspberries or blueberries for unique flavor variations.