
Delicious Easter Cookies Royal Icing: Recipes & Tips
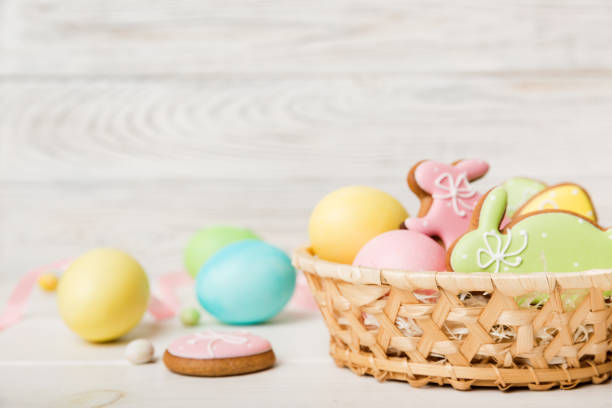
Easter is a time of celebration, family gatherings, and cherished traditions, and for many, this includes a delightful array of festive treats. One of the most beloved customs is baking and decorating cookies in shapes that represent the season, from whimsical bunnies to colorful Easter eggs. These cookies offer both a fun activity and a sweet indulgence, often enjoyed by both young and old alike. The vibrant colors and intricate designs not only bring joy to the table but also elevate the festive spirit of the holiday.
At the heart of these artistic cookie creations is royal icing, a versatile and essential element in cookie decoration. This icing provides a smooth, glossy finish that hardens beautifully, allowing for detailed piping and flooding techniques that make each cookie a personalized work of art. Whether you’re crafting a simple design or an elaborate masterpiece, royal icing is key to achieving that professional look while ensuring your cookies are both beautiful and delicious.
In this article, readers will learn everything they need to know about creating stunning Easter cookies adorned with royal icing. From a comprehensive recipe for the perfect cookie dough to mastering the royal icing technique, we’ll cover essential tips and tricks that will inspire your creativity. Along the way, we’ll explore the ingredients you need, share decorating techniques, and provide ideas for unique cookie designs that embody the spirit of Easter. Get ready to roll up your sleeves and embark on a baking adventure that will leave your friends and family in awe!

What is Royal Icing?
Royal icing is a type of icing made from egg whites and powdered sugar, known for its smooth and glossy finish. This decorative icing dries hard, making it perfect for intricate designs and delicate piping work on cookies. One of the key attributes of royal icing is its ability to hold its shape, allowing bakers to create detailed decorations that remain intact after the icing has dried.
The primary ingredients used in royal icing include:
- Egg Whites: These can be fresh egg whites or egg white powder (meringue powder) for convenience and safety.
- Confectioners’ Sugar: Also known as powdered sugar, it provides the necessary sweetness and structure to the icing.
- Lemon Juice or Water: These liquids are often added to adjust the consistency of the icing, making it easier to work with.
- Food Coloring: For festive designs, food coloring can be mixed into the royal icing to achieve a vibrant palette.
Royal icing is primarily used for cookie decorating but also has applications in cake decorating, where it can produce beautiful, detailed designs. Its benefits include a long shelf life and versatility, making it a favorite among both amateur and professional bakers.
Why Use Royal Icing for Easter Cookies?
When it comes to decorating Easter cookies, royal icing shines due to its aesthetic appeal and functional benefits. The smooth, hard finish it provides allows for stunningly vibrant designs and precise details. This makes it ideal for creating intricate patterns and beautiful color contrasts, perfect for the lively themes associated with Easter.
Compared to other icing types, royal icing offers several advantages:
- Texture: Once set, royal icing has a smooth and glossy surface that enhances the visual appeal of cookies.
- Drying Time: Royal icing dries relatively quickly, allowing for layered techniques and quicker decorating times.
- Versatility: It can be used for various decorating techniques such as flooding, piping, and drawing, which opens up endless creative possibilities for Easter cookie designs.
These qualities make royal icing the go-to choice for decorating festive Easter cookies, providing bakers with the tools to create memorable and delightful treats that capture the essence of the holiday.

Ingredients for Easter Cookies
Creating the perfect Easter cookies requires a combination of quality ingredients that will contribute to the texture and flavor. Below are the essential ingredients you will need for both the cookie dough and royal icing.
Basic Cookie Dough Ingredients
- All-purpose flour: This is the backbone of your cookie dough, providing structure.
- Sugar: Granulated sugar adds sweetness and helps with the texture.
- Baking powder: A leavening agent that ensures the cookies rise properly.
- Butter: Unsalted butter provides richness and flavor.
- Eggs: Eggs bind the ingredients together and add moisture.
- Vanilla extract: Adds a warm, sweet aroma and flavor that complements the cookies.
Ingredients for Royal Icing
- Egg whites or meringue powder: These are crucial for achieving the right consistency and stability in your icing.
- Confectioners’ sugar: This fine sugar creates the sweet base for the icing.
- Lemon juice or water: Used to adjust the consistency, making the icing easier to work with.
- Food coloring: A necessary addition for creating colorful and festive designs that enhance your Easter cookies.
Detailed Easter Cookie Recipe
Step-by-Step Cookie Dough Recipe
Ingredients:
- 2 ¾ cups all-purpose flour
- 1 cup granulated sugar
- 1 teaspoon baking powder
- 1 cup unsalted butter, softened
- 2 large eggs
- 2 teaspoons vanilla extract
Directions:
- In a large mixing bowl, cream together the softened butter and granulated sugar until light and fluffy.
- Add the eggs, one at a time, beating well after each addition, then mix in the vanilla extract.
- In a separate bowl, whisk together the flour and baking powder.
- Gradually add the dry ingredients to the wet mixture, mixing until combined.
- Chill the dough in the refrigerator for at least 1 hour for easier handling.
- Preheat your oven to 350°F (175°C). Roll out the chilled dough on a floured surface to about ¼-inch thickness.
- Use cookie cutters to cut out shapes and place them on a baking sheet lined with parchment paper.
- Bake for 8-10 minutes, or until the edges are lightly golden. Allow cooling before decorating.
Royal Icing Recipe
Ingredients:
- 2 large egg whites or 2 tablespoons meringue powder
- 4 cups confectioners’ sugar, sifted
- 2-3 tablespoons lemon juice or water
- Food coloring (as desired)
Directions:
- If using egg whites: In a clean, dry bowl, beat the egg whites until frothy. Gradually add the sifted confectioners’ sugar until stiff peaks form. If using meringue powder: Mix the powder with the water first, then follow the same steps.
- Adjust the consistency by adding lemon juice or water to achieve your desired thickness, usually a little thicker for piping and thinner for flooding techniques.
- If you plan to color the icing, divide it into separate bowls and stir in food coloring until the desired shades are reached.
Decorating Techniques
To achieve delightful designs on your Easter cookies, mastering piping and flooding techniques is essential. Piping involves using a piping bag fitted with a small round tip to draw intricate details. Flooding, on the other hand, is the process of covering the cookie’s surface with a thinner icing that can spread and fill in the outlines you’ve created. Here are some tips:
- Use a toothpick or a scribe tool to smooth out any bumps or air bubbles in flooded icing.
- Create dimension by layering different colors of royal icing. Allow each layer to dry before applying another.
- Add touches of edible glitter or gems to enhance the festive look of your cookies.
Creative Easter Cookie Ideas
Let your creativity run wild with various shapes and themes for your Easter cookies. Some popular shapes to consider include:
- Bunnies: Use cookie cutters to craft playful bunny shapes that can be decorated with colorful royal icing.
- Easter Eggs: Oval-shaped cookies that can be vibrant and patterned, reflecting traditional Easter egg designs.
- Chicks: Adorable chick shapes adorned with bright yellows and other festive colors.
Consider different color palettes that reflect the bright and rejuvenating feel of spring, such as pastel shades or bold primary colors. Personalized designs, like names or initials, can add a unique touch to each cookie, making them perfect for gatherings and gifting. Don’t hesitate to experiment with themes—combine your favorite elements to celebrate this joyous holiday in your own artistic way!
Storing and Serving Easter Cookies
To keep your Easter cookies fresh and tasty after decorating, proper storage is key. Store decorated cookies in an airtight container at room temperature to avoid moisture, which can cause the royal icing to soften. It is best to layer them between sheets of wax paper to prevent sticking.
For serving, arrange your cookies on a decorative platter or create a themed cookie box to surprise your guests. These treats make a great addition to Easter brunch or as festive party favors. If you have leftover royal icing, store it in an airtight container at room temperature for up to a week. You can also pipe it into different shapes and dry it to create edible decorations for future baking projects!
FAQs
Common Questions About Easter Cookies and Royal Icing
What is the best way to store royal icing?
Royal icing should be stored in an airtight container at room temperature. To keep it from drying out, press plastic wrap directly onto the surface of the icing before sealing the container.
Why did my royal icing not harden?
There are several possible reasons for this, including too much liquid added while mixing, humidity in the environment, or not enough sugar in the mixture. Make sure to follow the recipe precisely for best results.
Can I make royal icing without egg whites?
Yes, you can substitute meringue powder for egg whites in your royal icing recipe. Simply mix the meringue powder with water based on the package instructions to create a suitable substitution.
How do I get vibrant colors in my royal icing?
To achieve rich and vibrant colors, use gel or paste food coloring, which provides excellent pigmentation without adding too much liquid. Always start with a small amount and gradually add more to reach your desired hue.
Can I freeze decorated Easter cookies?
Yes, decorated cookies can be frozen. To do this, ensure the icing is completely dry, then layer the cookies in a freezer-safe container separated by parchment paper. Thaw them in the fridge before serving for best texture.
Conclusion
Decorating Easter cookies with royal icing is not just a fun activity; it’s a creative way to celebrate the joy of the holiday. With the right techniques, ingredients, and a sprinkle of imagination, your cookies can become edible masterpieces that delight both the eyes and the palate. We hope you feel inspired to try your hand at baking and decorating these festive treats!
easter cookies royal icing
Equipment
- 1 mixing bowls
- 1 electric mixer or whisk
- 1 rolling pin
- 1 cookie cutters Easter shapes
- 2 baking sheets
- 1 parchment paper
- 1 cooling rack
- 1 piping bags or resealable plastic bags
- 1 toothpick for detailing
Ingredients
- 2.5 cups all-purpose flour
- 1 teaspoon baking powder
- 0.5 teaspoon salt
- 0.5 cup unsalted butter, softened
- 1 cup granulated sugar
- 1 large egg
- 1 teaspoon vanilla extract
- 3 tablespoons meringue powder
- 4 cups powdered sugar
- 5-6 tablespoons water
- optional food coloring for tinting royal icing.
Instructions
- Preheat your oven to 350°F (175°C). Line baking sheets with parchment paper.
- In a mixing bowl, whisk together the flour, baking powder, and salt. Set aside.
- In a separate bowl, use an electric mixer to cream together the softened butter and granulated sugar until light and fluffy, about 3-4 minutes.
- Add the egg and vanilla extract to the butter mixture, mixing until well combined.
- Gradually incorporate the dry ingredients into the wet mixture, mixing until no flour streaks remain.
- Divide the dough in half, wrap in plastic wrap, and refrigerate for at least 30 minutes for easier rolling.
- Once chilled, roll out the dough on a floured surface to about ¼ inch thickness. Use cookie cutters to cut out your desired shapes.
- Place the cookies onto the prepared baking sheets, spacing them about 1 inch apart. Bake in the preheated oven for 8-10 minutes, or until the edges are golden.
- Remove from the oven and let the cookies cool on the baking sheets for 5 minutes before transferring them to a cooling rack to cool completely.
- For the royal icing, combine meringue powder and powdered sugar in a large bowl. Gradually add water, mixing until the desired consistency is achieved.
- If desired, divide the icing into separate bowls and tint with food coloring.
- Fill piping bags (or resealable bags with the corner cut off) with icing and decorate the cooled cookies as desired. Allow the icing to dry completely.