Best Classic Canadian Butter Tarts: A Delicious Guide
Butter tarts are undeniably one of the most cherished desserts in Canada, often evoking feelings of nostalgia and home. This sweet treat is characterized by its flaky pastry shell filled with a gooey, buttery mixture that can feature a variety of flavors and textures. As a quintessential Canadian dessert, butter tarts have found their way into the hearts—and stomachs—of both locals and visitors alike, making them a must-try delight on any Canadian culinary adventure.
The origins of butter tarts can be traced back to the early 19th century, with recipes believed to have evolved from English desserts. They quickly became a staple of Canadian cuisine, reflecting the resourcefulness of early settlers who utilized local ingredients to create something truly unique. Over the years, butter tarts have garnered cultural significance, becoming emblematic not just of Canadian gastronomy, but also of the shared stories and traditions that bind communities together. They have been celebrated in various provinces, often featuring prominently at fairs and family gatherings, solidifying their place in the national identity.
In this article, we will explore the delicious world of classic Canadian butter tarts, diving into their defining characteristics, historical background, and key ingredients. We will also provide you with a step-by-step recipe for making the perfect batch, as well as some delightful variations you can experiment with. Whether you are a seasoned baker or a curious novice, this comprehensive guide will illuminate the rich heritage of butter tarts and inspire you to create your own sweet masterpiece.
What Are Butter Tarts?
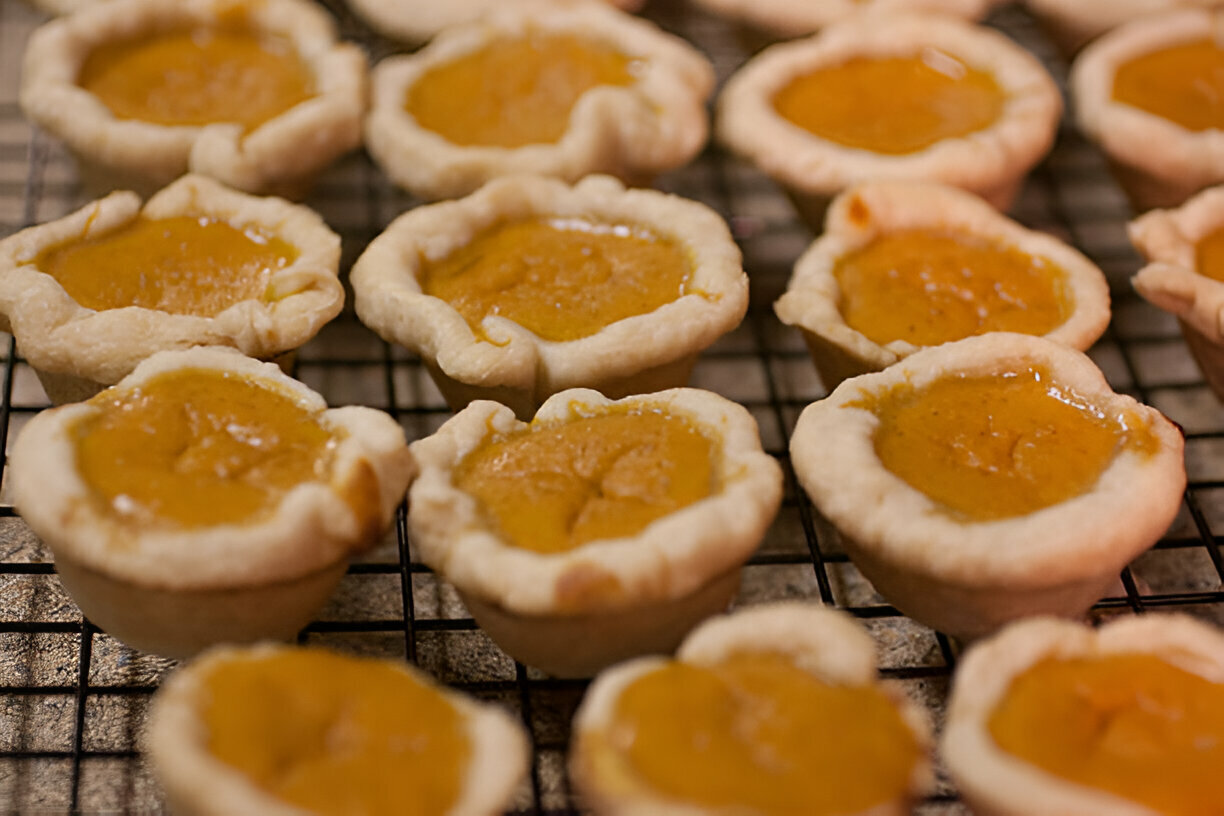
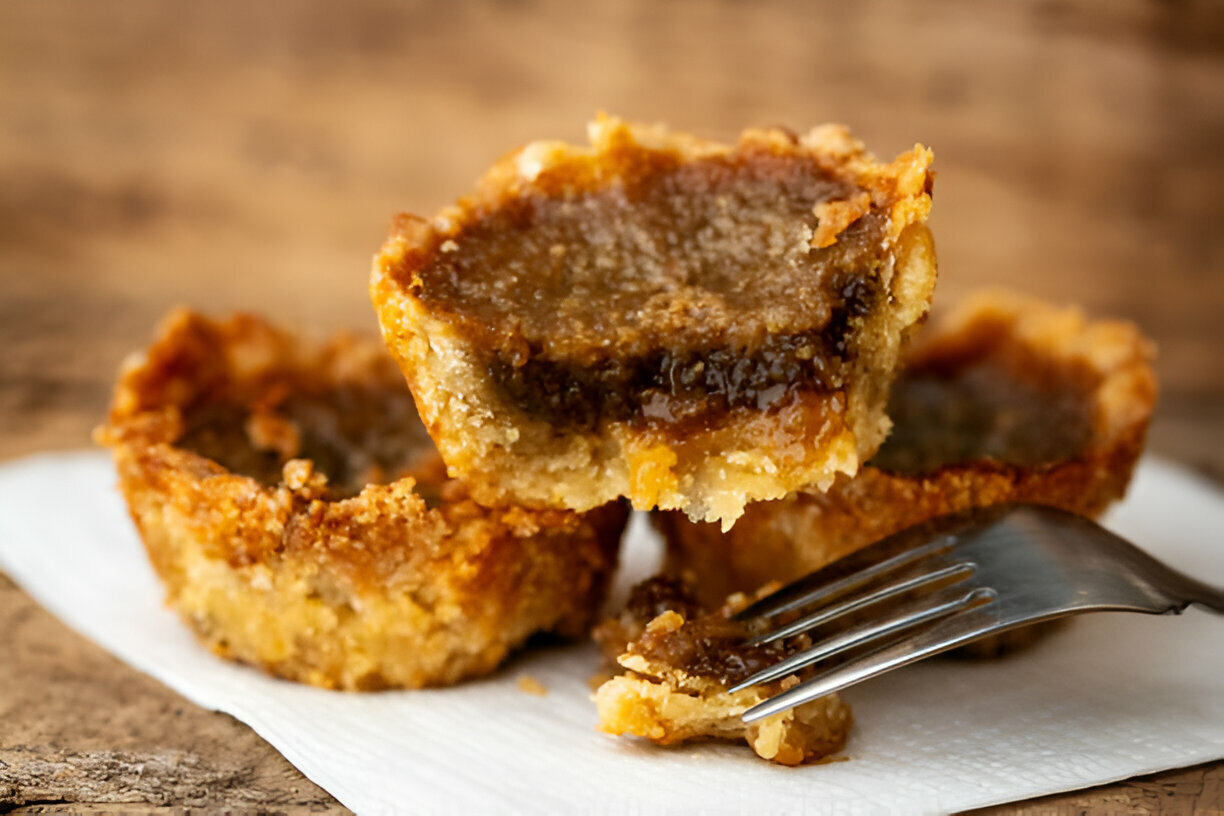
Butter tarts are a quintessential Canadian dessert, renowned for their rich, gooey filling nestled within a flaky pastry shell. This delightful treat features a buttery, sweet mixture that oozes with flavor, making each bite a luxurious experience. Typically, the filling consists of a blend of brown sugar, eggs, and vanilla, creating a smooth, caramelized texture that contrasts beautifully with the crispness of the crust.
The pastry itself is made from a simple combination of flour, butter, and water, which, when baked, transforms into a light and flaky base. The result is a harmonious balance between the rich filling and the delicate shell, ensuring that each tart has a satisfying bite. One of the most enjoyable aspects of butter tarts lies in the flexibility of their fillings. While the classic version is celebrated for its unadulterated buttery goodness, variations abound, with some bakers choosing to add ingredients like raisins, nuts, or chocolate. These additions can introduce different textures and flavors, appealing to diverse palates and preferences.
Whether you prefer the simplicity of the original recipe or the excitement of trying unique variations, butter tarts remain a beloved staple that captures the essence of Canadian baking. The charm of butter tarts lies in their versatility, allowing you to enjoy them as a traditional treat or experiment with creative twists.
The History of Butter Tarts
The journey of butter tarts began in the early 19th century, when they first made their appearance in Canadian cookbooks. Although similar to English desserts, butter tarts evolved into a distinct Canadian delicacy that showcased local ingredients and traditional cooking techniques. The first documented recipe dates back to approximately 1900, but oral histories suggest that the treat was enjoyed long before its formal introduction in print.
As settlers embraced their new environment, they incorporated readily available ingredients into their baking. The combination of sugar, butter, and eggs resulted in a rich filling that could be made using simple pantry staples. This adaptability and resourcefulness contributed significantly to the dessert’s popularity and its establishment as a cherished part of Canadian cuisine.
Over the years, butter tarts have garnered cultural significance, becoming emblematic of Canada’s culinary heritage. They celebrate the stories and traditions of communities across the country, often featured at family gatherings and local fairs. In fact, butter tarts hold such a special place in the hearts of Canadians that they have even been recognized as a national dish. This dessert’s ability to evoke a sense of nostalgia and home continues to resonate with both locals and visitors, making it a must-try for anyone wishing to experience the true flavor of Canada.
Key Ingredients for the Best Classic Canadian Butter Tarts
To create the perfect classic Canadian butter tarts, it is essential to use high-quality ingredients, as they play a crucial role in the final flavor and texture. Here, we break down the main ingredients necessary for both the pastry and the filling.
- Pastry Ingredients:
- Flour: All-purpose flour is typically used to create a tender and flaky crust. Ensure you measure it accurately to avoid a dense pastry.
- Butter: Use unsalted butter for better control of the salt content. Cold butter is ideal as it helps to make the pastry flakier.
- Water: Ice-cold water is crucial for bringing the dough together without melting the butter, which is essential for maintaining flakiness.
- Filling Ingredients:
- Brown Sugar: Dark brown sugar adds a rich caramel flavor and moisture to the filling, while light brown sugar will give a milder taste.
- Eggs: Eggs are vital for binding the filling together and providing it with a smooth, creamy texture when baked.
- Vanilla: Pure vanilla extract enhances the overall flavor, adding a lovely aromatic quality to the filling.
When selecting these ingredients, opt for organic or locally sourced produce whenever possible. This choice not only benefits local economies but also enhances the overall flavor of your butter tarts.
The Best Classic Canadian Butter Tarts Recipe
Ingredients
For 12 butter tarts, you will need the following ingredients:
- For the Pastry:
- 1 ½ cups all-purpose flour
- ½ cup unsalted butter, cold and cubed
- 1/4 cup ice water
- 1/2 teaspoon salt
- For the Filling:
- 1 cup brown sugar, packed
- 2 large eggs
- 1/2 cup unsalted butter, melted
- 1 teaspoon pure vanilla extract
- 1/4 teaspoon salt
Directions
Follow these step-by-step instructions to create your butter tarts:
- Prepare the Pastry: In a large mixing bowl, combine the flour and salt. Cut in the cold butter using a pastry cutter or your fingertips until the mixture resembles coarse crumbs. Gradually add ice water, one tablespoon at a time, mixing until the dough holds together. Form the dough into a disc, wrap it in plastic wrap, and refrigerate for at least 30 minutes.
- Preheat the Oven: Preheat your oven to 375°F (190°C).
- Roll Out the Dough: On a lightly floured surface, roll out the chilled dough to about 1/8-inch thickness. Use a round cookie cutter or a drinking glass to cut out circles of dough large enough to fit into your muffin tin.
- Fit into Muffin Tin: Gently press each circle into the cups of a muffin tin, making sure to push the dough up the sides to form a shell.
- Make the Filling: In a medium bowl, whisk together the brown sugar, eggs, melted butter, vanilla extract, and salt until smooth and well-combined.
- Assemble the Tarts: Pour the filling into each pastry shell, filling them about three-quarters full. Be careful not to overfill as the mixture will expand while baking.
- Bake: Place the muffin tin in the preheated oven and bake for 20-25 minutes, or until the filling is set and the tops are lightly golden.
- Cool: Allow the butter tarts to cool in the tin for about 10 minutes before carefully removing them. Transfer to a wire rack to cool completely.
- Serve: Enjoy your butter tarts warm or at room temperature, and pair them with a scoop of vanilla ice cream or a dollop of whipped cream for an extra treat.
Tips and Advice
To achieve the perfect crust and filling, consider the following tips:
- For a flakier crust, ensure the butter remains cold during the mixing process.
- Feel free to customize your butter tarts by adding nuts, chocolate chips, or raisins to the filling.
- Store leftover tarts in an airtight container for up to three days or freeze them for later enjoyment.
Variations on Classic Butter Tarts
While the classic butter tart is a beloved favorite, many delightful variations allow for creative experimentation. Here are a few popular alternatives:
- Raisin Butter Tarts: A traditional variation featuring sweet raisins mixed into the filling, adding a chewy texture that complements the creaminess.
- Chocolate Butter Tarts: For chocolate lovers, adding semi-sweet or dark chocolate chips to the filling creates a rich, decadent twist.
- Nutty Butter Tarts: Incorporating chopped pecans or walnuts provides a crunchy contrast to the soft filling, enhancing flavor and texture.
Experimenting with different fillings not only makes for exciting variations but also allows you to create a personalized versions of this classic Canadian dessert.
Serving Suggestions and Pairings
When it comes to enjoying butter tarts, there are numerous ways to enhance your experience:
- Serve warm with a scoop of vanilla ice cream for a delightful contrast of temperatures.
- Pair with freshly brewed coffee or tea, which complements the richness of the tarts.
- Add toppings such as whipped cream, fresh berries, or a drizzle of caramel sauce to elevate the presentation and flavor.
Whether for a celebration or a cozy night in, butter tarts can be enjoyed in many delightful ways, making them a versatile dessert choice.
FAQ Section
Here are answers to some common questions regarding butter tarts:
- What is the difference between butter tarts and pecan pies? While both feature a sweet filling, butter tarts are typically made with a custard-style mixture, and may or may not include nuts. Pecan pies have a thicker, more gel-like filling often loaded with pecans.
- Can you freeze butter tarts? Yes, they freeze well! Place cooled butter tarts in an airtight container, and they can last up to three months in the freezer.
- How do you store butter tarts? Store them in an airtight container at room temperature for up to three days. For longer storage, consider freezing.
- What’s the best way to reheat butter tarts? To reheat, place them in an oven preheated to 350°F (175°C) for about 10 minutes, or until warmed through.
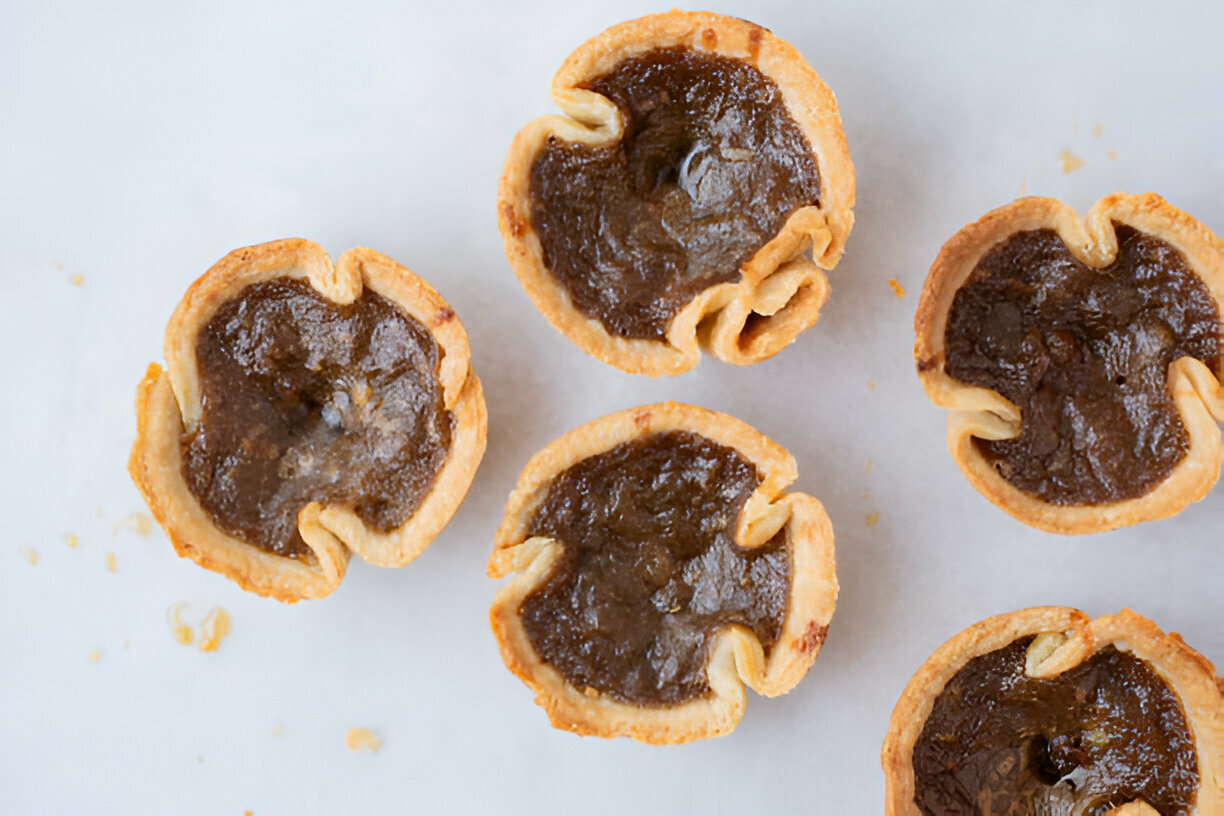
- How do you know when butter tarts are done baking? The filling should be set but still slightly jiggly in the center and the tops should have a slight golden hue.
Conclusion
Butter tarts hold a significant place in Canadian culture, representing not just a delicious dessert, but also a connection to shared traditions and community gatherings. By trying the classic recipe or exploring unique variations, you can experience the delightful flavors of this iconic treat. We encourage you to whip up a batch, enjoy them with loved ones, and perhaps even share your creations with others! Happy baking!
Best Classic Canadian Butter Tarts
Equipment
- 1 mixing bowl
- 1 rolling pin
- 1 muffin tin
- 1 pastry cutter or fork
- 1 small saucepan
- 1 spoon or spatula
- 1 measuring cups and spoons
Ingredients
- 1.5 cups all-purpose flour
- 0.5 cup unsalted butter Cold, cubed.
- 1/4 teaspoon salt
- 3 tablespoons ice water
- 1 cup brown sugar
- 0.5 cup corn syrup
- 1/4 cup unsalted butter Melted.
- 2 large eggs
- 1 teaspoon vanilla extract
- 1/4 teaspoon salt
- 0.5 cup raisins or walnuts Optional.
Instructions
- In a mixing bowl, combine the flour and salt. Add the cold, cubed butter and blend using a pastry cutter or fork until the mixture resembles coarse crumbs.
- Gradually mix in the ice water until the dough comes together. Shape the dough into a disk, wrap in plastic, and refrigerate for about 30 minutes.
- Preheat the oven to 375°F (190°C).
- Roll out the chilled dough on a floured surface to about 1/4 inch thick. Cut out circles slightly larger than the muffin tin cups.
- Gently press each dough circle into the muffin tins, ensuring it covers the base and sides.
- In a small saucepan, combine the brown sugar, corn syrup, melted butter, eggs, vanilla extract, and salt. Whisk until smooth and well combined.
- If using, sprinkle raisins or chopped walnuts into each pastry shell.
- Pour the filling mixture into each pastry shell, filling them about 2/3 full to allow for expansion during baking.
- Bake in the preheated oven for 20-25 minutes or until the filling is bubbling and the pastry is lightly golden brown.
- Remove from oven and allow to cool in the muffin tin for about 5 minutes before transferring to a wire rack to cool completely.