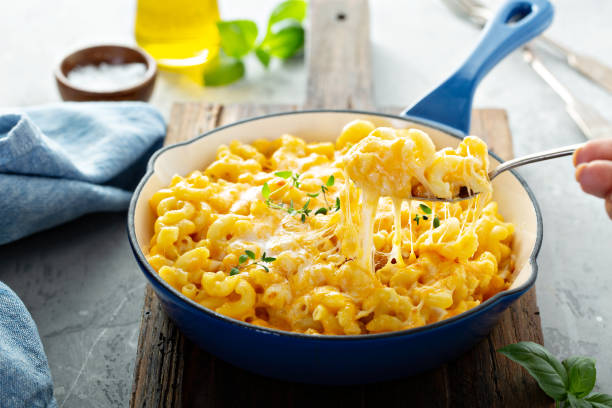
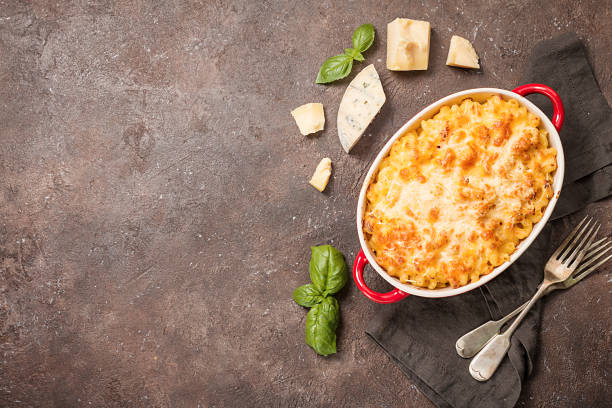
Creamy Baked Mac and Cheese: The Ultimate Comfort Food Recipe
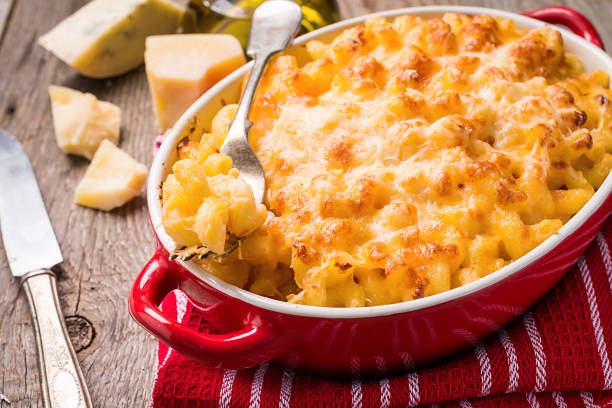
Creamy baked mac and cheese is a beloved dish that has captured the hearts and palates of people across generations. Its warm, comforting nature and rich flavors make it a staple in households, potlucks, and festive gatherings. This classic comfort food combines pasta with a luscious cheese sauce, creating a dish that is both satisfying and indulgent. The secret to a perfect baked mac and cheese often lies in its creamy texture, which elevates the experience from merely filling to truly delightful.
In this article, we aim to provide you with a delicious recipe for creamy baked mac and cheese, along with tips and tricks to ensure that your dish is a crowd-pleaser. Whether you are a novice in the kitchen or a seasoned chef, you will find valuable insights on ingredients, preparation methods, and ways to customize your mac and cheese to suit your taste. So, grab your apron, and let’s dive into the creamy, cheesy world of baked mac and cheese!
History of Mac and Cheese
Creamy baked mac and cheese has a rich and fascinating history that traces back to its origins in Europe. The earliest known recipe can be found in a book dating from the 1700s, where pasta was combined with a mixture of cheeses and butter, forming the foundation of what we now cherish as mac and cheese. Over the years, this dish crossed the Atlantic, finding a special place in American cuisine, particularly gaining popularity during the 1930s when processed cheese products became widely available.
As mac and cheese became a staple comfort food in the United States, it was embraced in various regional cuisines, notably in the Southern states. Here, the dish garnered its own unique identity, often featuring additional ingredients like eggs or breadcrumbs, giving rise to different variations that showcased local flavors and culinary styles.
Evolution Over Time
Throughout its evolution, mac and cheese has seen numerous adaptations worldwide, from Italian “maccheroni al formaggio” to the creamy versions beloved in the United Kingdom. Each culture has added its own twist, ensuring that this simple dish remains versatile and beloved. In American households, particularly in the South, the dish took on a new life, often served at gatherings or family dinners, uniting generations over a shared love for its cheesy goodness.
Moreover, as food trends evolved, so did mac and cheese. It has transitioned from a simple, home-cooked meal to an upscale dining staple, often found on the menus of gourmet restaurants with unique toppings and artisanal cheeses. Thus, while its origins may be humble, the evolution of creamy baked mac and cheese reflects both a rich history and a continuing journey of culinary creativity.
Ingredients for Creamy Baked Mac and Cheese
To create the perfect creamy baked mac and cheese, using the right ingredients is crucial. Below are the essential ingredients that will help you achieve that delightful, cheesy experience.
Essential Ingredients
- Elbow Macaroni: The classic choice for mac and cheese, providing a familiar shape that holds the cheese sauce beautifully.
- Cheeses: A combination of cheeses works best. Popular choices include sharp cheddar for flavor, Gruyère for creaminess, and mozzarella for meltability.
- Milk and Cream: Whole milk and heavy cream create a luxurious sauce. The combination helps achieve that desired creamy texture.
- Butter: Unsalted butter is recommended for making the roux, adding richness to your sauce.
- Flour: All-purpose flour is used to thicken the cheese sauce, creating that perfect, velvety consistency.
- Seasonings: Salt and pepper are essential, along with mustard powder to enhance the cheese flavor!
Optional Additions
- Breadcrumb Topping: For those who love a crunchy texture on top, a seasoned breadcrumb mixture can provide the perfect contrast.
- Bacon or Ham: Adding cooked bacon or diced ham gives a delicious smokiness to the dish.
- Vegetables: Consider adding steamed broccoli, jalapeños, or even sun-dried tomatoes for a unique twist.
- Herbs and Spices: Fresh herbs like parsley or thyme can elevate the dish, while spices like paprika can add warmth and depth of flavor.
Step-by-Step Recipe for Creamy Baked Mac and Cheese
Directions
1. Cook the Pasta
Begin by bringing a large pot of salted water to a boil. Add the elbow macaroni and cook according to package instructions until al dente. Drain and rinse under cold water to stop the cooking process, then set aside.
2. Prepare the Cheese Sauce
In a medium saucepan over medium heat, melt 4 tablespoons of unsalted butter. Once melted, whisk in 4 tablespoons of all-purpose flour to form a roux. Cook for about 1-2 minutes until bubbly. Gradually add 3 cups of milk and 1 cup of heavy cream, whisking constantly until the mixture thickens and comes to a simmer.
Reduce the heat to low, and add your cheese of choice—about 3 cups grated. Stir until all the cheese is melted and the sauce is smooth. Season with salt, pepper, and 1 teaspoon of mustard powder to taste.
3. Combine Pasta and Cheese Sauce
In a large mixing bowl, combine the cooked macaroni with the cheese sauce. Stir well to ensure that each piece of pasta is coated in the creamy goodness.
4. Bake
Preheat your oven to 350°F (175°C) and transfer the macaroni and cheese mixture into a greased 9×13 inch baking dish. If desired, sprinkle an even layer of seasoned breadcrumbs on top for added crunch. Bake for 25-30 minutes, until the cheese is bubbly and the breadcrumbs are golden brown.
Cooking Tips and Advice
Using high-quality cheese is vital for a flavorful mac and cheese. Adjust the consistency by adding more or less milk depending on your preference for creaminess. For a crispy topping, keep an eye on the oven towards the end to avoid burning.
Flavor Variations
Different Cheese Combos
Experimenting with different cheese combinations can take your mac and cheese to the next level. Try pairing sharp cheddar with creamy goat cheese for a bold flavor or using Fontina and Parmesan for a nutty taste.
Add-ins and Toppings
Consider enhancing your dish with add-ins. Cooked lobster or crab can make it feel indulgent, while sautéed vegetables offer intriguing flavors and textures. Additionally, spices like cayenne pepper or garlic powder can add an unexpected kick.
Serving Suggestions
Serve your creamy baked mac and cheese alongside a fresh green salad or roasted vegetables for a complete meal. It also pairs wonderfully with a light soup for a cozy night in.
Healthier Alternatives
Substitutions for Lighter Versions
If you’re looking for a healthier version of mac and cheese, consider using whole-grain pasta for added fiber. Opt for reduced-fat cheese and milk to lower calorie intake, or try blending in some pureed cauliflower or butternut squash for added nutrition without sacrificing creaminess.
Nutritional Considerations
For health-conscious individuals, incorporating additional vegetables can boost the nutrients in your dish while keeping it satisfying. Always be mindful of portion sizes to enjoy this comfort food without overindulging.
Storage and Reheating Tips
Storing Leftovers
After enjoying your creamy baked mac and cheese, store any leftovers in an airtight container in the refrigerator for up to 3-4 days. Make sure to let it cool completely before sealing the container to preserve its texture.
Reheating Methods
When reheating, the oven is the best option to maintain the creamy texture. Preheat to 350°F (175°C), cover the dish with foil to prevent drying out, and heat for about 20-25 minutes. Alternatively, you can microwave individual portions, adding a splash of milk to help restore creaminess.
FAQs
Common Questions about Creamy Baked Mac and Cheese
- How can I make mac and cheese creamier? To enhance creaminess, use a blend of cheeses and adjust the ratio of milk to cheese in your recipe.
- What cheese is best for mac and cheese? Sharp cheddar is a classic choice, but combining it with creamy cheeses like Gruyère or Fontina can add depth of flavor.
- Can I use gluten-free pasta? Yes! Gluten-free pasta works well, though cooking times may vary slightly.
- How long does baked mac and cheese last? When stored properly in an airtight container, it can last for 3-4 days in the refrigerator.
- Can I prepare mac and cheese ahead of time? Absolutely! Prepare the dish up to the baking stage, cover and refrigerate, and bake when ready to serve.
Conclusion
Creamy baked mac and cheese is truly a beloved comfort food, perfect for gatherings, family dinners, or simply a cozy night in. We encourage you to try the recipe provided and explore your own variations to make it uniquely yours!

Creamy Baked Mac and Cheese
Equipment
- 1 large pot
- 1 baking dish (9x13 inches)
- 1 saucepan
- 1 whisk
- 1 wooden spoon
- 1 colander
- 1 set measuring cups and spoons
- 1 oven mitts
Ingredients
- 8 ounces elbow macaroni
- 4 tablespoons unsalted butter
- ¼ cup all-purpose flour
- 3 cups whole milk
- 2 cups shredded sharp cheddar cheese
- 1 cup shredded mozzarella cheese
- ½ teaspoon garlic powder
- ½ teaspoon onion powder
- ½ teaspoon mustard powder
- to taste salt
- to taste pepper
- 1 cup breadcrumbs Optional for topping.
- 2 tablespoons melted butter Optional for topping.
Instructions
- Preheat the oven to 350°F (175°C).
- In a large pot, bring salted water to a boil. Add elbow macaroni and cook according to package instructions until al dente. Drain and set aside.
- In a saucepan over medium heat, melt the butter. Once melted, whisk in the flour and cook for about 1 minute until bubbly and golden.
- Gradually add the milk while whisking continuously to avoid lumps. Continue whisking until the mixture thickens, around 5-7 minutes.
- Stir in the cheddar cheese, mozzarella cheese, garlic powder, onion powder, mustard powder, salt, and pepper. Mix until all cheese is melted and the sauce is smooth.
- Combine the cooked macaroni with the cheese sauce, ensuring all pasta is well coated.
- Pour the macaroni and cheese mixture into a greased baking dish.
- If using, mix the breadcrumbs with melted butter and sprinkle evenly over the top of the mac and cheese.
- Bake in the preheated oven for 25-30 minutes until bubbly and golden brown on top.
- Allow it to cool for a few minutes before serving.