
Easter Cutout Cookies: A Delicious Guide to Spring Baking
As spring arrives and the vibrant colors of Easter fill the air, one delightful tradition takes center stage: baking Easter cutout cookies. These whimsical treats, often shaped like bunnies, eggs, and flowers, not only satisfy the sweet tooth but also add a festive touch to celebrations. The aroma of fresh cookies wafting through the home creates a warm and inviting atmosphere, making it a cherished activity for families and friends alike.
Easter cookies play a significant role in holiday traditions, symbolizing the joy of renewal and togetherness. Baking and decorating these cookies can turn into a fun family event, fostering creativity and shared memories. Whether it’s a solo endeavor or a group activity, the process of rolling dough, cutting shapes, and adorning them with colorful icing brings a sense of excitement and anticipation. The act of exchanging cookies with loved ones also highlights the spirit of giving that accompanies the Easter season.
In this article, readers can expect to delve into the enchanting world of Easter cutout cookies. From the history behind these delightful desserts to the essential ingredients needed, we will guide you through a comprehensive step-by-step recipe that will have you baking like a pro. Additionally, you will discover creative decorating ideas, tips for involving kids in the fun, and best practices for storing and freezing your cookies. Let’s embark on this joyous culinary adventure together and make this Easter memorable with beautifully crafted cookies!
History of Easter Cutout Cookies
The tradition of cutout cookies, especially during Easter, has deep roots that trace back to various cultures and celebrations. Originally, cookie recipes were utilized for special occasions, with shapes being symbolic of different meanings. The practice of cutting cookies into specific shapes emerged in Europe, particularly during the Middle Ages when bakers began to experiment with creative designs.
Easter has always been a time of renewal and joy, which is reflected in the playful designs of cookies during this season. Various cultures added their unique touches to Easter cookies, often incorporating local customs and flavors. For instance, in some European countries, cookies shaped like eggs symbolize fertility and new life, while in others, bunnies represent rebirth. These designs mirror the essence of spring, drawing inspiration from the natural world bursting back to life after winter.
As time progressed, baking became an integral part of Easter celebrations. Families began to gather to bake and decorate these treats, turning what started as a solitary craft into a communal activity filled with laughter and creativity. Today, Easter cutout cookies are a beloved tradition across the globe, bringing generations together in the spirit of celebration and attachment to heritage.
Essential Ingredients for Easter Cutout Cookies
Creating delightful Easter cutout cookies begins with the right ingredients. While the base ingredients may be common across many cookie recipes, they contribute significantly to the final product’s texture and flavor.
- Flour: All-purpose flour forms the backbone of any cookie dough, providing structure and stability.
- Sugar: Granulated sugar adds sweetness, while brown sugar can introduce a hint of caramel flavor if desired.
- Butter: Unsalted butter is essential for rich flavor and helps achieve a lovely texture when creamed with sugar.
- Eggs: Eggs not only help bind the ingredients together but also contribute to the moisture of the dough.
- Flavorings: Adding vanilla or almond extract elevates the taste, infusing a delightful aroma into the cookies.
When it comes to decorating, special ingredients come into play:
- Royal icing: This classic icing sets up hard, making it perfect for intricate decorations and details.
- Food coloring: Vibrant colors can bring your cookies to life, allowing creative expression.
- Sprinkles and edible glitter: These fun toppings add a festive touch and make cookies visually appealing.
With these essential ingredients in hand, you’re well on your way to creating beautiful and delicious Easter cutout cookies that will delight everyone at your gathering.
Step-by-Step Recipe for Easter Cutout Cookies
Ingredients
To make delightful Easter cutout cookies, gather the following ingredients:
- 3 cups all-purpose flour
- 1 cup unsalted butter, softened
- 1 cup granulated sugar
- 2 large eggs
- 1 teaspoon vanilla extract
- 1/2 teaspoon salt
- Baking powder (optional for variation)
Directions
- Prepare the Dough
- Cream the butter and sugar together until light and fluffy. This usually takes about 2-3 minutes. The mixture should be smooth without any lumps.
- Beat in the eggs one at a time, followed by the vanilla extract until well combined.
- Gradually mix in the flour, salt, and optional baking powder until a soft dough forms. If the dough feels too sticky, add a tablespoon of flour at a time until it’s manageable. Wrap in plastic wrap and chill in the refrigerator for at least 1 hour.
- Roll Out and Cut Shapes
- After chilling, preheat your oven to 350°F (175°C). Lightly flour a clean surface and roll out the dough to about 1/4 inch thick.
- Use cookie cutters to create your favorite Easter shapes, such as bunnies, eggs, and flowers. Place the cutout cookies on a parchment-lined baking sheet.
- Bake the Cookies
- Arrange the cookies on baking sheets, ensuring they are spaced apart. Bake for 8-10 minutes or until the edges are lightly golden. Keep a close eye on them to avoid over-baking.
- Once baked, remove the cookies from the oven and allow them to cool on the baking sheets for a few minutes before transferring them to wire racks to cool completely.
- Decorate
- While the cookies are cooling, prepare the royal icing by mixing egg whites and powdered sugar until thick and glossy. You can add coloring if desired.
- Use piping bags or a small spatula to decorate your cookies, employing different techniques to create beautiful designs.
Tips for Perfect Cookies
For the best results, follow these tips:
- Always chill the dough to help maintain the shape of the cookies while baking.
- Avoid over-baking to keep the cookies soft and chewy inside while developing a light golden color on the edges.
- Store decorated cookies in an airtight container at room temperature, or freeze un-decorated cookies for later use. To refresh decorated cookies after freezing, allow them to thaw at room temperature.
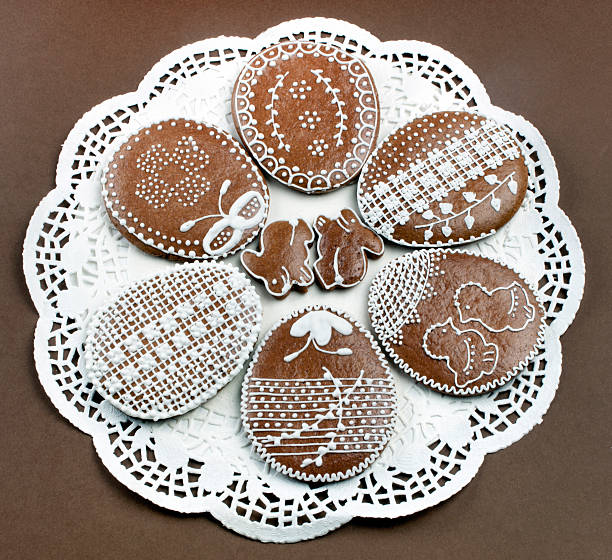
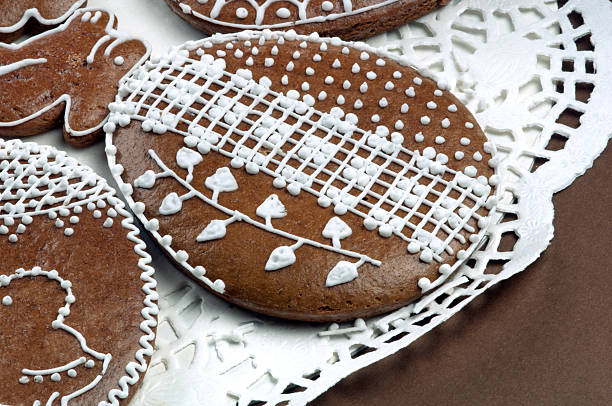
Creative Decorating Ideas for Easter Cutout Cookies
Techniques
Decorating Easter cutout cookies can be a fun and creative experience. Here are some popular techniques:
- Piping Bags: Using piping bags allows for precise control over icing, ideal for intricate designs and fine details.
- Fondant vs. Icing: Fondant creates a smoother surface for decorating, while icing can be easier to manipulate for unique designs. Choose based on your project!
Theme Ideas
Get inspired with these popular Easter themes for cookie decorating:
- Pastel Colors: Utilize soft pinks, blues, yellows, and greens for a classic Easter palette that reflects the season’s colors.
- Floral Designs: Incorporate flowers or floral patterns onto your cookies to celebrate the blooming season.
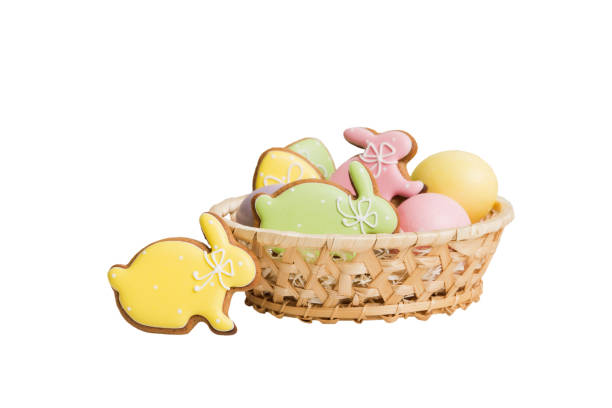
- Bunny Designs: Create adorable bunny shapes to capture the essence of Easter with playful details.
- Personalized Cookies: Add special touches such as names or initials for family gatherings or celebrations.
Tips for Making Easter Cutout Cookies with Kids
Baking with kids can be a joyful experience. Here are some tips to make it engaging:
- Kid-Friendly Techniques: Simplify the process by allowing kids to help with mixing ingredients and cutting out shapes.
- Choosing Simple Shapes: Opt for larger, simpler cookie shapes that are easier for little hands to handle.
- Involving Kids in Decorating: Encourage kids to use their imagination when decorating cookies with their favorite colors and designs.
Storing and Freezing Easter Cutout Cookies
Ensuring your cookies stay fresh is essential for enjoyment later. Here are some best practices:
- Best Practices for Storage: Store cooled cookies in an airtight container at room temperature to maintain their softness.
- Freezing Cookies: For longer-term storage, freeze un-decorated cookies in airtight freezer bags. They can be kept frozen for up to 3 months.
- Thawing and Refreshing Decorated Cookies: To refresh decorated cookies after freezing, let them thaw at room temperature and enjoy within a few days.
Frequently Asked Questions (FAQs)
- Can I use different flavors in Easter cutout cookies? Yes, feel free to experiment with different extracts like lemon or coconut for unique flavor profiles.
- How can I decorate cutout cookies without royal icing? You can use simple glaze made from powdered sugar and milk or melted chocolate for decorating.
- What other occasions can I make cutout cookies for? Cutout cookies are great for birthdays, holidays, or any festive events throughout the year!
- How long do cutout cookies last after baking? Generally, baked cookies can last 1-2 weeks at room temperature and up to 3 months if frozen.
Conclusion
Embarking on the adventure of baking Easter cutout cookies is sure to bring joy to your holiday celebrations. With this comprehensive guide, you have all the tools and inspiration to create delicious and beautifully decorated cookies that your friends and family will love.
Call to Action
We invite you to share your own baking experiences! Leave your comments below, share your creations on social media, and don’t forget to subscribe for more delightful baking recipes.
easter cutout cookies
Equipment
- 1 mixing bowl
- 1 electric mixer or whisk
- 1 rolling pin
- various cookie cutters Easter shapes
- 2 baking sheets
- 1 parchment paper
- 1 cooling rack
Ingredients
- 2 3/4 cups all-purpose flour
- 1 teaspoon baking powder
- 1/2 teaspoon salt
- 1 cup unsalted butter Softened
- 1 1/2 cups granulated sugar
- 1 large egg
- 1 tablespoon vanilla extract
- 1 teaspoon almond extract Optional
Instructions
- In a mixing bowl, whisk together the flour, baking powder, and salt. Set aside.
- In a large bowl, use an electric mixer or whisk to cream together the softened butter and sugar until light and fluffy.
- Add the egg, vanilla extract, and almond extract (if using) to the butter mixture, and mix until well combined.
- Gradually incorporate the flour mixture into the wet ingredients, mixing until a soft dough forms. Be careful not to overmix.
- Divide the dough in half, shape each half into a disc, and wrap in plastic wrap. Chill in the refrigerator for at least 1 hour or until firm.
- Preheat your oven to 350°F (175°C) and line baking sheets with parchment paper.
- On a floured surface, roll out one disc of dough to about 1/4 inch thickness. Use cookie cutters to cut out desired shapes and place them on the prepared baking sheets.
- Bake in the preheated oven for 8-10 minutes, or until the edges are lightly golden. Allow the cookies to cool on the baking sheets for a few minutes before transferring them to a cooling rack to cool completely.
- Repeat with the remaining dough.