Perfect Gluten-Free Dinner Rolls: Easy Recipe & Tips
In recent years, gluten-free diets have gained significant popularity, driven by an increased awareness of health and wellness. Many individuals are adopting gluten-free lifestyles, whether due to celiac disease, gluten sensitivity, or personal preference. As a result, there’s a growing demand for gluten-free alternatives that maintain the delightful texture and taste of traditional baked goods. For those who love bread, the absence of gluten can often feel restrictive, making it crucial to find satisfying substitutes that cater to dietary needs without compromising flavor or enjoyment.
Among the most sought-after gluten-free options are bread alternatives, particularly dinner rolls. These versatile additions can elevate any meal, serving as perfect accompaniments to soups, salads, or hearty main courses. Gluten-free dinner rolls provide an opportunity to enjoy a familiar staple while accommodating dietary restrictions. With the right ingredients and techniques, you can create rolls that are just as light, fluffy, and delicious as their gluten-filled counterparts.
This article will guide you through the essentials of gluten-free baking, exploring the various gluten-free flours available, the health benefits they offer, and the science behind creating the perfect roll. Whether you’re a seasoned baker or new to gluten-free cooking, this recipe for gluten-free dinner rolls will help you craft a delightful addition to your dining table. Get ready to impress family and friends with homemade rolls that everyone can enjoy, regardless of their dietary preferences!
Understanding Gluten-Free Flours
When embarking on your gluten-free baking journey, understanding the various gluten-free flours available is essential. Each type offers distinct flavors, textures, and nutritional profiles, making them suitable for different recipes, including dinner rolls. Here’s a closer look at some of the most popular gluten-free flours:
- Almond Flour: Made from finely ground almonds, almond flour is rich in protein and healthy fats. It lends a moist texture to baked goods and contributes a subtle nutty flavor.
- Coconut Flour: This flour is derived from dried coconut meat and is highly absorbent. It adds a hint of coconut flavor and is often used in combination with other flours due to its unique properties.
- Rice Flour: A staple in gluten-free baking, rice flour provides a neutral flavor and is excellent for creating a light and airy texture in rolls. It’s often used as a base in gluten-free flour blends.
- Tapioca Flour: Extracted from cassava root, tapioca flour adds chewiness and crispness to baked goods. It is often combined with other flours to enhance the overall texture.
For the best results when making gluten-free dinner rolls, a combination of these flours can provide a more balanced flavor and texture. Using a blend that includes a primary flour like rice flour and additives such as almond or tapioca flour can yield delightful results. When selecting gluten-free flours, look for high-quality products, preferably those that are certified gluten-free, to ensure safety and consistency in your baking.
Health Benefits of Gluten-Free Dinner Rolls
Adopting a gluten-free diet can bring several nutritional benefits, particularly for individuals diagnosed with celiac disease or those with gluten sensitivity. Gluten-free dinner rolls can be a delicious way to include wholesome ingredients that may enhance overall health.
One major advantage of gluten-free diets is the increased consumption of whole foods, such as fruits, vegetables, and grains that are naturally gluten-free. These foods are typically rich in vitamins, minerals, and fiber, promoting better digestive health and overall well-being.
For individuals with celiac disease or gluten sensitivity, gluten-free dinner rolls eliminate harmful gluten proteins that can cause inflammatory reactions. Thus, these rolls not only provide enjoyment but also contribute to a healthier lifestyle for those who must avoid gluten.
Moreover, gluten-free options can also be beneficial for everyone. Many gluten-free flours are rich in nutrients and may have a lower glycemic index, potentially helping to manage blood sugar levels. This makes gluten-free dinner rolls an excellent choice not just for those with dietary restrictions but for anyone looking to explore diverse and healthy food options.

The Science Behind Gluten-Free Baking
To grasp the intricacies of gluten-free baking, it’s essential to understand the role that gluten plays in traditional baking. Gluten is a protein found in wheat and provides the structure and elasticity in dough, allowing it to rise and hold its shape during baking. In gluten-free baking, the absence of gluten means that achieving similar results requires different techniques and ingredients.
Gluten-free dough behaves differently compared to its gluten-containing counterparts. It tends to be more fragile and doesn’t rise in the same manner. This is where specific ingredients come into play to mimic gluten’s textural properties. Common substitutes include xanthan gum and psyllium husk, which help bind ingredients together, providing elasticity and structure to the dough.
Xanthan gum is a fermented sugar that adds viscosity and thickness, creating a more bread-like quality in gluten-free baked goods. Meanwhile, psyllium husk, a soluble fiber, not only enhances the texture but also retains moisture, resulting in softer and fluffier rolls. By understanding these components, bakers can create delicious gluten-free dinner rolls that are both satisfying and enjoyable.
Step-by-Step Recipe for Gluten-Free Dinner Rolls
Ingredients
- 2 cups gluten-free all-purpose flour
- 1 cup warm water
- 3 tbsp olive oil
- 2 tbsp honey or maple syrup
- 1 packet active dry yeast
- 1/2 tsp salt
- 1/2 tsp xanthan gum or psyllium husk
Directions
Step 1: Activating the yeast
In a small bowl, combine the warm water and honey or maple syrup. Sprinkle the active dry yeast over the surface of the water, and let it sit for about 5-10 minutes until it becomes foamy. This step ensures that the yeast is active and ready to help the rolls rise.
Step 2: Mixing the dry ingredients
In a large mixing bowl, whisk together the gluten-free all-purpose flour, salt, and xanthan gum or psyllium husk until well combined. This ensures even distribution of the dry ingredients and prepares them for incorporation with the wet ingredients.
Step 3: Combining wet and dry ingredients
Once the yeast mixture is frothy, add it to the bowl with the dry ingredients, along with the olive oil. Stir using a spatula or wooden spoon until you form a cohesive dough. The dough will be thicker than traditional bread dough but should still be somewhat pliable.
Step 4: Letting the dough rise
Cover the mixing bowl with a clean kitchen towel or plastic wrap and place it in a warm, draft-free area. Allow the dough to rise for about 30-45 minutes, or until it has visibly expanded in size. This fermentation process is crucial for flavor development and texture.
Step 5: Shaping rolls and second rise
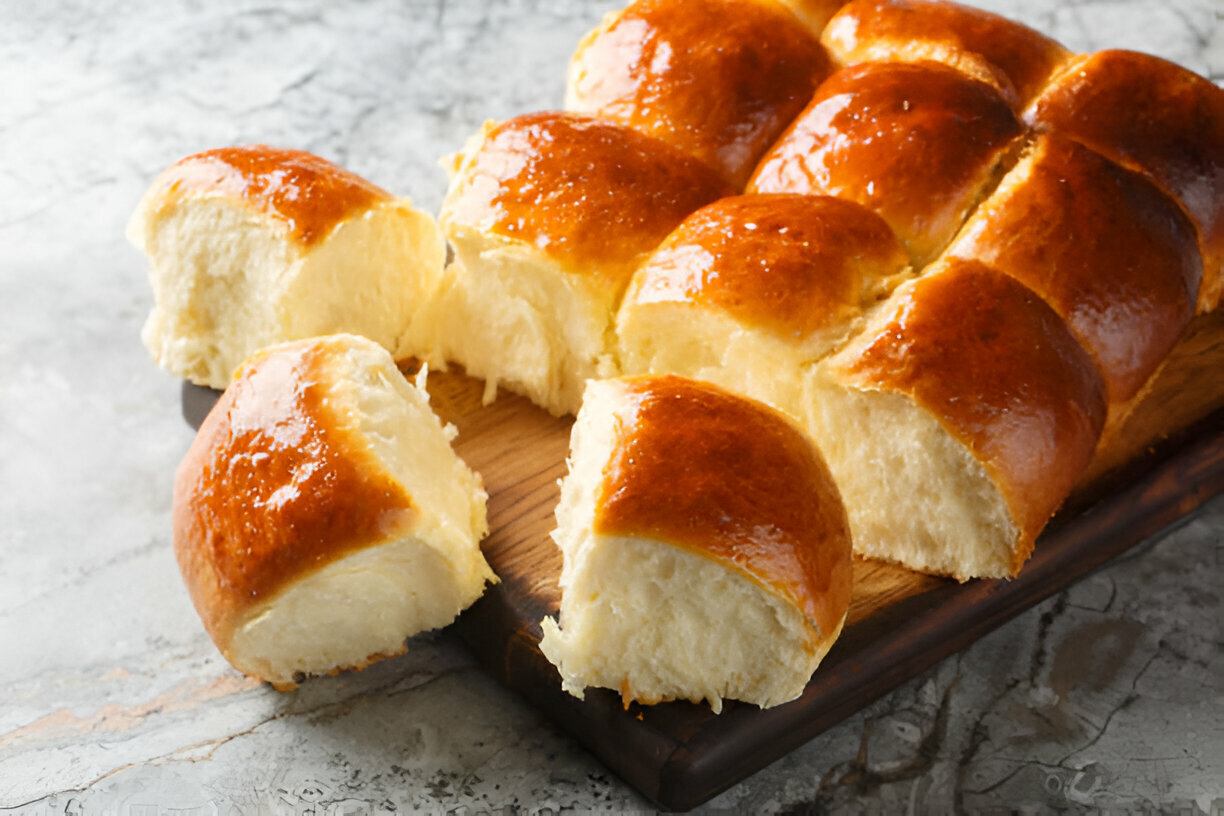
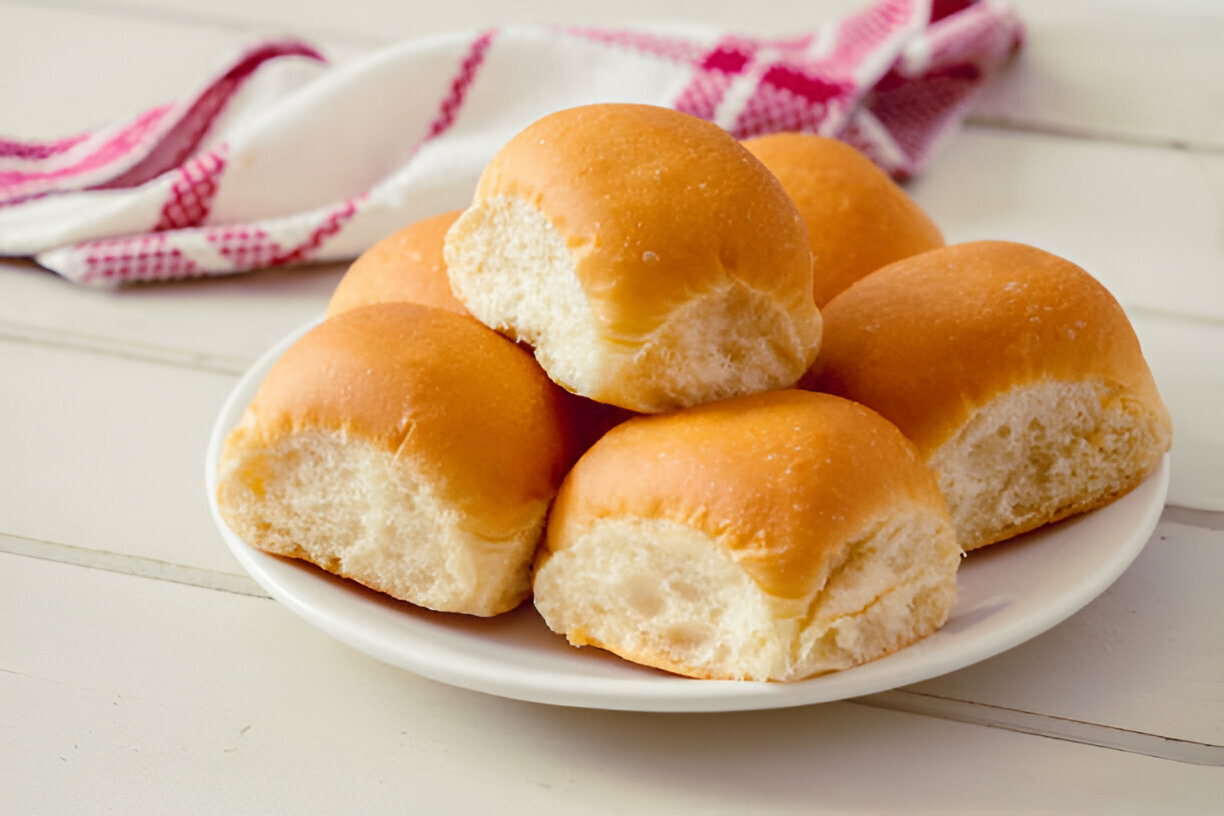
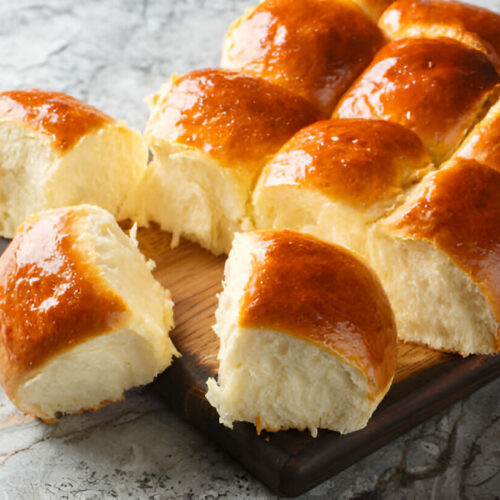
Once the dough has risen, lightly flour your working surface with additional gluten-free flour. Divide the dough into 8 equal portions and shape them into balls. Place the shaped rolls onto a parchment-lined baking sheet, leaving space between them for further rising. Cover again and let them rise for an additional 20-30 minutes.
Step 6: Baking
Preheat your oven to 375°F (190°C). Once the rolls have completed their second rise, remove the cover and bake them in the preheated oven for 20-25 minutes, or until they are golden brown and sound hollow when tapped on the bottom. A toothpick inserted into the center should come out clean.
Step 7: Serving suggestions
Once baked, allow the gluten-free dinner rolls to cool slightly on a wire rack. These rolls are best served warm and can be enjoyed plain, with butter, or alongside your favorite soups and salads. They also pair wonderfully with various spreads, such as hummus or garlic herb butter.
Tips for Success
While baking gluten-free dinner rolls can be enjoyable and rewarding, there are common pitfalls to avoid. Ensure that all your ingredients are fresh, as stale ingredients can affect the outcome. Measure your flour carefully, using a spoon to fluff it before scooping to avoid packing. Lastly, remember that gluten-free dough is different; it won’t behave like traditional dough, so be patient and follow the instructions closely to achieve the best results.
Creative Variations of Gluten-Free Dinner Rolls
If you’re looking to add a twist to your gluten-free dinner rolls, there are several creative variations you can try. Here are a few ideas:
- Cheese-stuffed gluten-free rolls: Before shaping the rolls, place a cube of your favorite cheese in the center of each dough ball for a gooey filling.
- Herb-infused gluten-free rolls: Incorporate dried or fresh herbs, such as rosemary or thyme, into the dough for a savory flavor boost.
- Sweet (cinnamon) gluten-free rolls: Add a mixture of cinnamon and sugar to the dough and swirl it before shaping for a delightful sweet treat.
Storing and Reheating Gluten-Free Dinner Rolls
To preserve the freshness of your gluten-free dinner rolls, it’s essential to store them properly. Allow the rolls to cool completely before placing them in an airtight container. You can keep them at room temperature for a couple of days or refrigerate them for up to a week.
For longer storage, consider freezing the rolls. Ensure they are fully cooled, then wrap each roll individually in plastic wrap and place them in a freezer bag. When you’re ready to enjoy them, simply thaw at room temperature or reheat in the oven at 350°F (175°C) for about 10-15 minutes, until warm and fluffy.
Frequently Asked Questions (FAQs)
Can I use regular flour instead of gluten-free flour?
No, regular flour contains gluten, which is what makes traditional bread rise. For gluten-free rolls, it’s essential to use gluten-free flour blends.
What can I substitute for xanthan gum?
You can use psyllium husk as an alternative to xanthan gum. Both ingredients serve similar functions in gluten-free baking.
How can I make these dinner rolls dairy-free?
Replace the olive oil with a dairy-free butter substitute or use additional olive oil. All other ingredients are naturally dairy-free.
Why did my gluten-free rolls not rise?
Several factors might affect the rise, including inactive yeast, improper measurements, or not allowing enough rising time. Ensure your yeast is fresh and activated properly.
Can I freeze gluten-free dinner rolls?
Yes, you can freeze the rolls as mentioned above. Just remember to wrap them well to prevent freezer burn.
Conclusion
Embracing gluten-free diets doesn’t mean sacrificing on taste or texture. With the right ingredients and techniques, delicious gluten-free dinner rolls can become a staple on your dining table, appealing to everyone, regardless of their dietary preferences.
Call to Action
We invite you to share your experiences and any variations you try on social media! Don’t forget to subscribe for more delicious gluten-free recipes and helpful tips.
Gluten-Free Dinner Rolls
Equipment
- 1 mixing bowl
- 1 whisk
- 1 rubber spatula
- 1 baking sheet
- 1 parchment paper
- 1 measuring cups and spoons
- 1 oven
Ingredients
- 2 cups gluten-free all-purpose flour
- 1/4 cup almond flour
- 1/4 cup tapioca flour
- 1 tablespoon active dry yeast
- 1 teaspoon sugar
- 1 teaspoon salt
- 1 cup warm water 110°F/43°C
- 1/4 cup olive oil
- 2 large eggs
- 1 teaspoon apple cider vinegar
Instructions
- Preheat your oven to 375°F (190°C). Line a baking sheet with parchment paper and set it aside.
- In a mixing bowl, combine the warm water, sugar, and active dry yeast. Let it sit for about 5-10 minutes until it becomes frothy.
- In another bowl, whisk together the gluten-free all-purpose flour, almond flour, tapioca flour, and salt.
- Once the yeast mixture is frothy, add the olive oil, eggs, and apple cider vinegar. Mix well.
- Gradually add the flour mixture to the wet ingredients. Stir with a rubber spatula until a sticky dough forms.
- With your hands slightly moistened, divide the dough into 12 equal portions and shape them into rolls. Place the rolls on the prepared baking sheet, leaving some space in between.
- Cover the rolls with a clean kitchen towel and let them rise in a warm place for about 20 minutes.
- Bake the rolls in the preheated oven for 25 minutes or until they are golden brown and sound hollow when tapped on the bottom.
- Remove from the oven and let them cool on a wire rack.
- For added flavor, you can brush the rolls with melted butter or garlic butter as soon as they come out of the oven.