Hands Down the BEST Homemade Dinner Rolls Recipe Guide
There’s something undeniably heartwarming about the aroma of homemade dinner rolls wafting through your kitchen. Whether it’s a holiday gathering, a cozy family dinner, or simply a comforting weeknight meal, freshly baked rolls elevate the dining experience, wrapping each bite in a soft, fluffy embrace. Making dinner rolls at home brings a sense of nostalgia and joy, as you connect with the process of kneading dough and watching it rise, transforming simple ingredients into something extraordinary.
However, the cornerstone of achieving that delightful fluffiness lies in using the right recipe. Not all dinner rolls are created equal, and the perfect blend of ingredients and technique can make all the difference between a dry, dense roll and one that’s light and airy. In this guide, we promise to deliver a foolproof recipe that will have you mastering the art of dinner rolls in no time. With our comprehensive instructions and insights into the science of baking, you’ll be able to impress your family and friends with rolls that are not just good but truly the best. Get ready to roll up your sleeves and embark on a baking adventure that will make your table shine with warmth and flavor!
The Secret to Perfect Dinner Rolls
To craft the best homemade dinner rolls, it’s crucial to understand the ingredients that play a significant role in their texture and flavor. Choosing the right flour is an essential first step. All-purpose flour is versatile and often used for various baking needs, while bread flour contains higher protein levels that contribute to the rolls’ structure and chewiness. For the fluffiest results, opting for bread flour is a great choice.
Next on the ingredient list is yeast, which is the magic behind the rise of your rolls. There are two main types to consider: active dry yeast and instant yeast. Active dry yeast must be proofed in warm water before use, whereas instant yeast can be mixed directly with dry ingredients. Using instant yeast offers convenience and a faster rise, making the baking process more efficient.
Milk and butter not only add richness but also sweetness to your dinner rolls. Whole milk will provide the best flavor, while unsalted butter adds a creamy texture, enhancing the overall taste. Lastly, sugar plays a pivotal role, serving not only to sweeten but also to promote browning during baking, giving your rolls that golden finish.
The Science of Rising
The art of baking dinner rolls extends beyond just the ingredients; it hinges on understanding the science of rising. Proofing is a critical step where the yeast ferments, producing carbon dioxide that makes the dough expand. It’s essential to ensure that your dough has the time it needs to proof adequately, typically described in stages: first rise and second rise. Each stage matters greatly in achieving light and airy rolls.
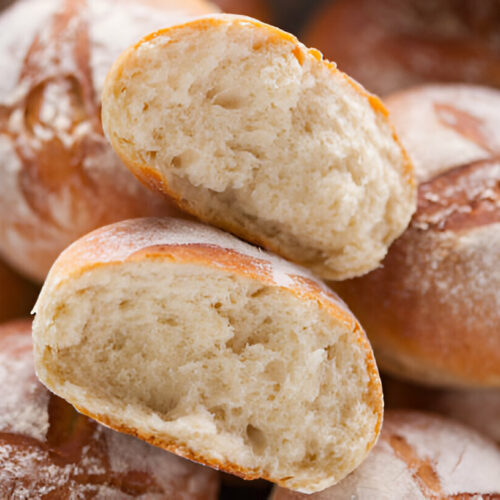
Kneading is another vital aspect that contributes to the roll’s texture. By working the dough, you develop gluten, which gives the rolls their structure. Over-kneading can result in tough rolls, while under-kneading may produce dense ones. Hence, kneading should be done until the dough is smooth and elastic, typically around 8-10 minutes.
Lastly, patience is key when it comes to fermentation. Allowing sufficient rise time can be tempting to rush through, but taking the time to let the dough rise leads to an improved texture and flavor. Embrace patience, and your homemade dinner rolls will reward you with a light, fluffy finish that will leave everyone wanting more.
Recipe Overview
Creating the best homemade dinner rolls involves a straightforward process, starting with the right ingredients. Below, you’ll find a comprehensive list followed by step-by-step directions to guide you through each stage of making perfect rolls.
Ingredients
- 4 cups bread flour (plus extra for dusting)
- 2¼ teaspoons instant yeast
- 1½ cups whole milk, warmed
- ½ cup unsalted butter, melted
- ¼ cup granulated sugar
- 1 teaspoon salt
Directions
Follow these step-by-step instructions to achieve soft and fluffy dinner rolls:
- Preparing the Dough: In a large mixing bowl, combine the bread flour, instant yeast, sugar, and salt. Mix well. Add the warmed milk and melted butter, and mix until a shaggy dough forms.
- Kneading: Transfer the dough to a floured surface and knead for about 8-10 minutes until the dough is smooth and elastic.
- First Rise: Place the dough into a greased bowl, cover it with a clean kitchen towel or plastic wrap, and let it rise in a warm place for about 1-2 hours, or until doubled in size.
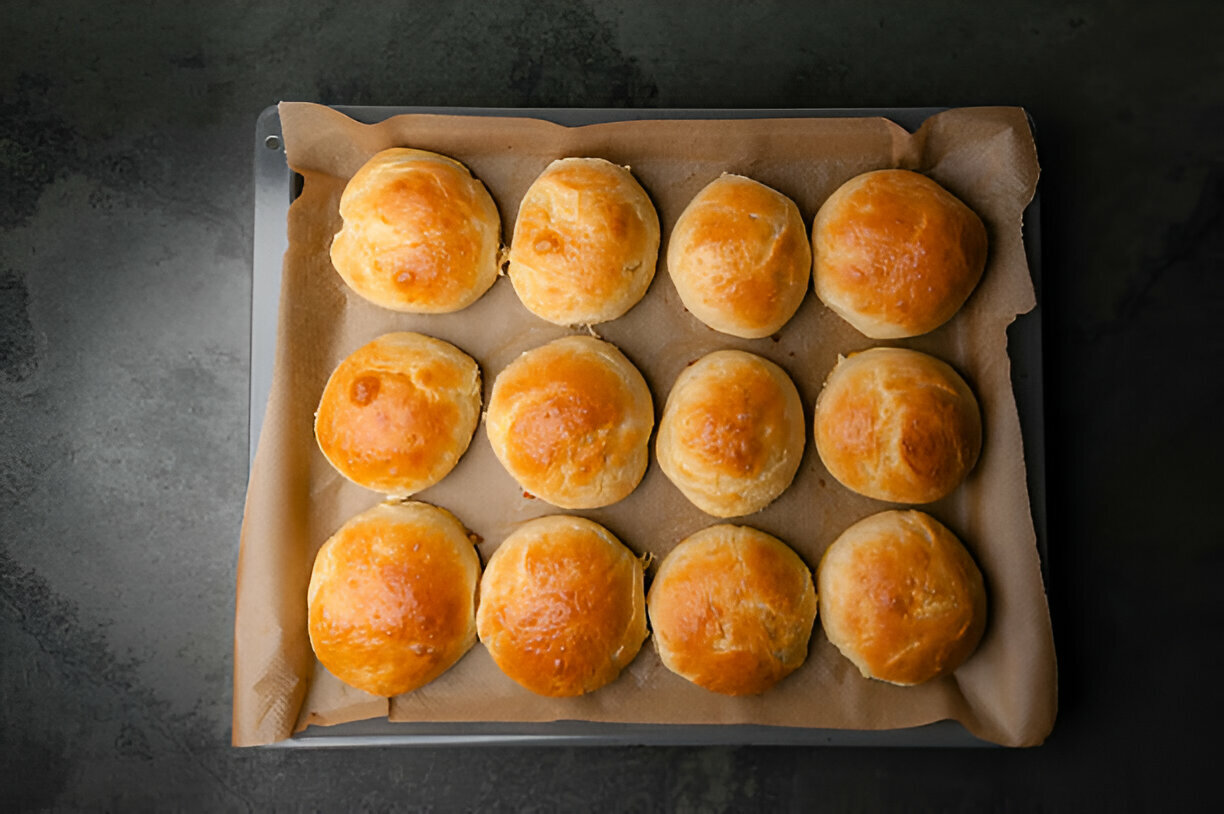
- Shaping the Rolls: Punch down the risen dough to release the air. Divide the dough into 12 equal pieces and shape each piece into a ball. Place the balls in a greased 9×13-inch baking dish.
- Second Rise: Cover the shaped rolls with a towel and let them rise again in a warm place for another 30-45 minutes, or until they have doubled in size.
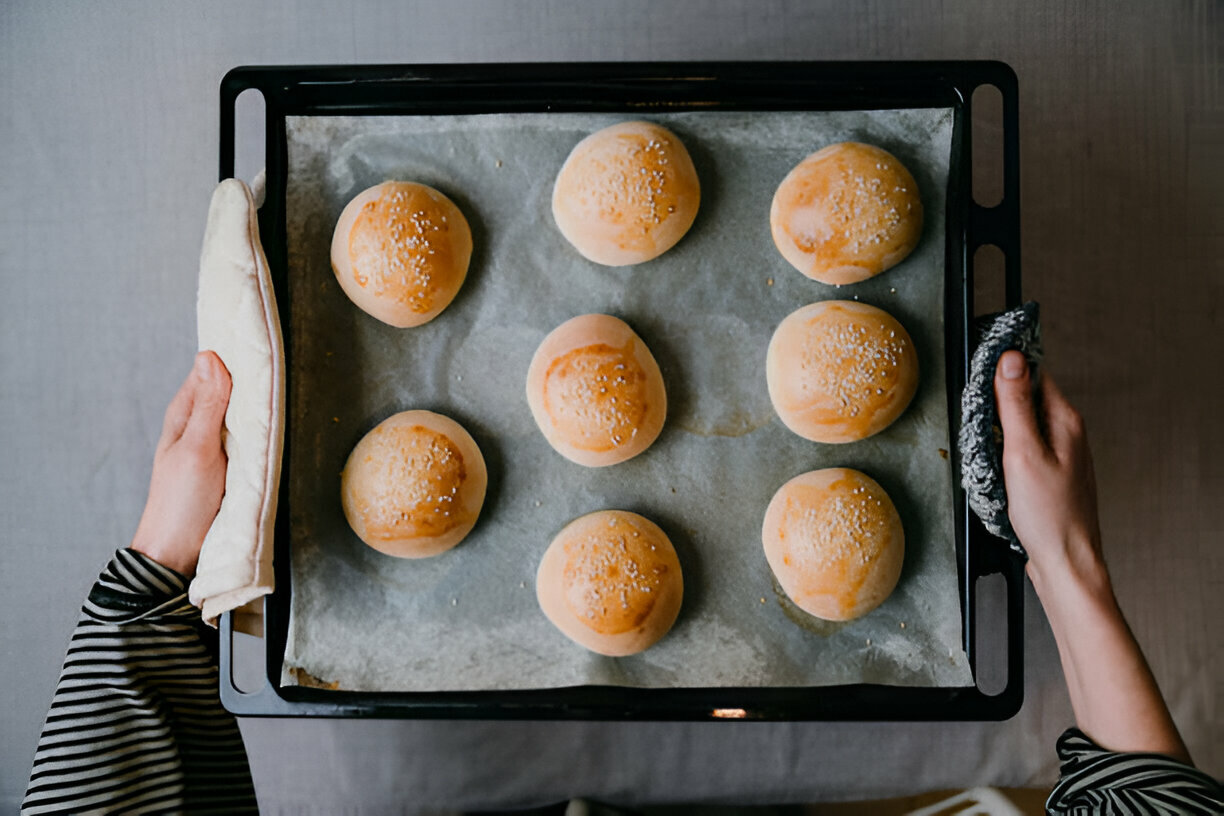
- Baking: Preheat your oven to 350°F (175°C). Bake the rolls for 20-25 minutes, or until they are golden brown on top.
- Cooling and Serving: Remove the rolls from the oven and let them cool for a few minutes in the pan before transferring them to a wire rack. Serve warm, and enjoy!
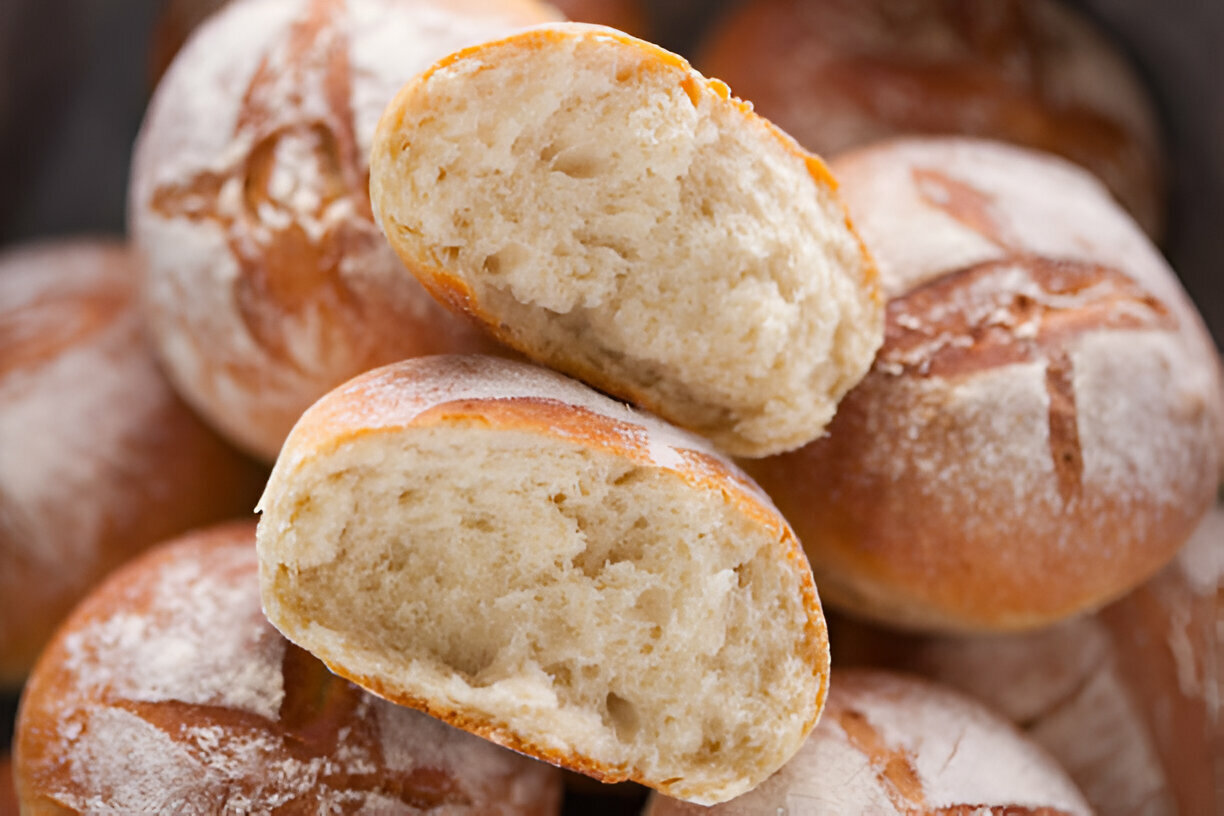
Visual Appeal
To achieve those stunning golden-brown tops, brush the rolls with melted butter right after they come out of the oven. This not only enhances the flavor but also gives them a beautiful shine. For a soft interior, ensure you do not overbake, keeping an eye on the color as they bake.
Tips and Tricks for Success
Common Mistakes to Avoid
- Over-kneading the Dough: While kneading is essential for developing gluten, too much can lead to tough rolls. Aim for that smooth, elastic texture without going overboard.
- Not Allowing for Enough Rise Time: Rushing the proofing process can lead to dense rolls. Make sure to give the dough ample time to rise during both stages for the best texture.
- Using the Wrong Yeast Type: Active dry yeast and instant yeast are not interchangeable without adjustments. Stick to the recommended type for optimal results.
Enhancements and Variations
- Adding Herbs or Spices: Incorporate rosemary or garlic powder into the dough for a flavorful twist.
- Cheese-Stuffed Dinner Rolls: Add a piece of cheese in the center when shaping the rolls for a delicious surprise.
- Sweet Dinner Rolls: Mix cinnamon and sugar into the dough or sprinkle it on top before baking for a delightful dessert option.
How to Serve Homemade Dinner Rolls
Homemade dinner rolls are versatile and can elevate any meal. Serve them alongside hearty soups, roasted meats, or your favorite pasta dishes. They are also perfect with a selection of butters, jams, or honey for breakfast or brunch.
When it comes to storage, keeping your leftover rolls in an airtight container at room temperature can maintain their softness. If you plan to enjoy them later, consider freezing them. Just wrap them tightly in plastic wrap and aluminum foil to prevent freezer burn.
To reheat your leftover rolls, place them in a warm oven (about 350°F) for a few minutes to restore their magical softness. A quick microwave zap with a damp paper towel can also do the trick for those in a hurry!
Frequently Asked Questions
What type of yeast should I use for dinner rolls?
For the best results, it’s recommended to use instant yeast, as it provides a quicker rise and is more convenient to work with than active dry yeast. However, if you prefer active dry yeast, be sure to proof it first in warm water before adding it to your dry ingredients.
How can I make dinner rolls ahead of time?
You can prepare the dough ahead of time and refrigerate it after the first rise. When you are ready to bake, simply shape the rolls and let them rise again before baking. Alternatively, you can shape the rolls, refrigerate them overnight, and bake them straight from the fridge after an additional rise time.
Can I freeze homemade dinner rolls?
Yes, homemade dinner rolls freeze very well. After baking, allow them to cool completely, then wrap them tightly in plastic wrap followed by aluminum foil, and store them in the freezer. They can last up to three months and can be reheated directly from the freezer.
What’s the best way to store leftover dinner rolls?
Store leftovers in an airtight container at room temperature for up to three days. For longer storage, wrap them tightly and freeze them as mentioned above.
Why are my dinner rolls dense and not fluffy?
Several factors can contribute to dense rolls, including under-proofing, using too much flour, or not kneading adequately. Make sure to follow the recipe precisely, allow enough rise time, and knead the dough until it reaches the right texture for the fluffiest results.
Conclusion
There’s nothing quite like the warmth and comfort of homemade dinner rolls, whether shared amongst family at a bustling table or savored alone with a touch of butter. This recipe promises not only to be effective but to turn baking into a cherished ritual that you’ll look forward to repeating time and again. We encourage you to take the plunge, roll up your sleeves, and create your version of these delightful rolls that will elevate any meal.
Call to Action
We invite you to try this foolproof dinner roll recipe and experience the joy of homemade baking. Don’t forget to share your photos and feedback with us! If you loved this recipe, check out our other delicious recipes on our website, and embark on more culinary adventures. Happy baking!
Hands Down the BEST Homemade Dinner Rolls Recipe
Equipment
- 1 mixing bowl
- 1 measuring cups and spoons
- 1 wooden spoon or spatula
- 1 kitchen towel or plastic wrap
- 1 baking sheet
- 1 parchment paper (optional)
- 1 oven
Ingredients
- 2 ¼ teaspoons active dry yeast 1 packet
- 1 cup warm milk about 110°F or 43°C
- ¼ cup granulated sugar
- ¼ cup unsalted butter melted
- 1 large egg
- 3 ½ to 4 cups all-purpose flour
- 1 teaspoon salt
- 2 tablespoons melted butter for brushing optional
Instructions
- In a mixing bowl, combine the warm milk and sugar. Sprinkle the yeast over the top and let it sit for about 5-10 minutes until foamy.
- Add the melted butter and egg to the yeast mixture and stir until combined.
- Gradually add the flour, one cup at a time, along with the salt. Mix until a dough forms.
- Knead the dough on a floured surface for about 5-7 minutes until it becomes smooth and elastic.
- Place the dough in a greased bowl and cover it with a kitchen towel or plastic wrap. Let it rise in a warm place for about 1 hour, or until doubled in size.
- Once risen, punch down the dough and divide it into 12 equal pieces. Roll each piece into a ball.
- Place the dough balls onto a lined or greased baking sheet, spacing them about 2 inches apart.
- Cover the rolls with a towel and let them rise again for 30 minutes, or until puffy.
- Preheat the oven to 375°F (190°C).
- Bake the rolls for 15-20 minutes, or until they are golden brown on top.
- If desired, brush the hot rolls with melted butter right after taking them out of the oven.
- Serve warm and enjoy your delicious homemade dinner rolls!